You have a WordPress site and are thinking about creating web forms for WordPress. Even if you don’t know much about creating forms, it is a simple job to do. There are many free WordPress form creator sites, like forms.app here. You can even use templates to create a decent form in less than a minute.
Online forms have a variety of benefits. Basically, it allows you to engage, interact, and provide a better experience for your visitors. A well-designed form can attract the attention of your visitors, and apart from that, you can store the data of your forms in the form-making sites and use it later for data analysis. Thus, whether you are a business owner or not, you will see the advantages of using online forms.
What is a WordPress form?
WordPress forms are online forms created by site owners and published on their WordPress websites. There is no limit to the types of forms, and the website owners can easily create a form by using a form builder tool. After creating a form, they can embed it on their website.
How to create an online form for your WordPress website
There are many sites where you can create free forms for your WordPress website, but you can create forms without using any code in forms.app. Thus, in this article, we will explain how you can create a form on forms.app, which can provide you with a good user experience. We'll show you step-by-step how simple form creation is.
1 - Open the forms.app and sign-up or log in to your account
In order to create and share the form you have created, you must be registered with forms.app. It is not difficult to sign up, you can quickly sign up with your accounts such as Google and Facebook. Signing up and creating a form is free, so you don't have to worry.
2 - Select a template page or start from scratch
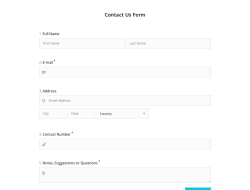
forms.app offers you countless template possibilities. These templates offer you the form you want to be created in a short time, or you can start with a blank template to fill it on your own choice. Some of the most useful templates for WordPress users are website contact forms, product order forms, and email sign-up forms. You can select one of them to continue on.
3 - Edit your forms
After clicking use template, you will have come to the edit page. This page is easy to operate and offers you advanced features. You can change form fields to your own taste. Add media to them or make a field as required. But there are also further steps to improve your form:
a) Welcome page settings
By activating the welcome page on the Settings page, you can write a title and a description that your visitors will see when they first enter your form. You can explain and describe what the form is about and why they need to fill that form. In this way, you will eliminate the questions in the minds of your visitors.
b) Thank-you page settings
By activating the thank you page on the Settings page, you can write a title and a description that your visitors will see when they finish your form. It will make your visitors understand that they have finished the form.
c) Conditions
As the name suggests, conditions allow you to determine which form field the visitors will be directed to according to their choices by associating form fields with each other. It may sound complicated, but it is far away from being complicated. Firstly choose to add a condition. There will be two fields: The “if” field and the “Then” field; you need to configure the “if” part to be able to access the “then” part.
d) Calculator
The calculator is a feature you can use on some forms, such as quizzes and order forms. You can add points to form fields. When an option is chosen, the point will be seen.
4 - Design your form
Designing is also an important part of creating a form. forms.app provides you with various themes and customization options that you can use. There are even animated backgrounds you can use, and you can change between the list view and step view.
5 - Share your form
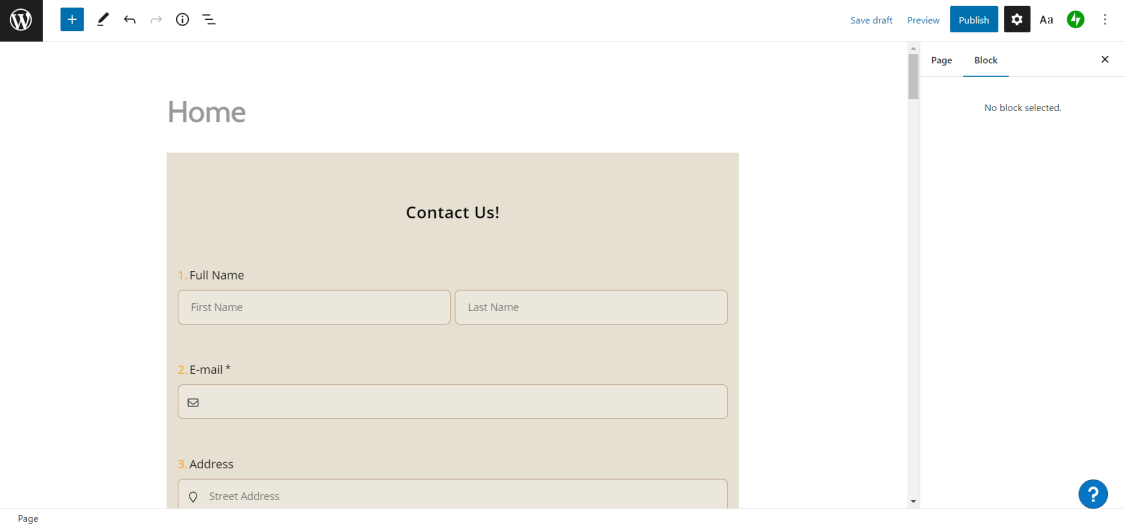
Once you have created your form, all you have to do is share it on your website. You can embed the form with a shortcode or with HTML. It is explained in detail how to share it below.
Tips to take your form to the next level
It is useful to keep some points in mind while creating a form. Because the form audience is real people. If you don't present the form to these people in a proper manner, your form may not be liked or filled up.
1 - Make it short because people don’t like to fill out forms that are too long. So, you should write or add form fields relevant to your form and don’t keep it long.
2 - Don’t forget to double-check and preview your forms. You can spot the errors and misleading parts by doing so.
3 - You should obtain the consent of your respondents and should not share their data with 3rd parties.
How to embed your forms on your website
After you have finished creating your form, various ways to share your form will appear on the share page. But since our topic is just WordPress online forms, we will show you how to easily share your form on your WordPress website. It should also be noted that you can do this with the form builder WordPress plugin of forms.app. If you are constantly using forms in your WordPress site, downloading this plugin will speed up your work.
Embedding with shortcode
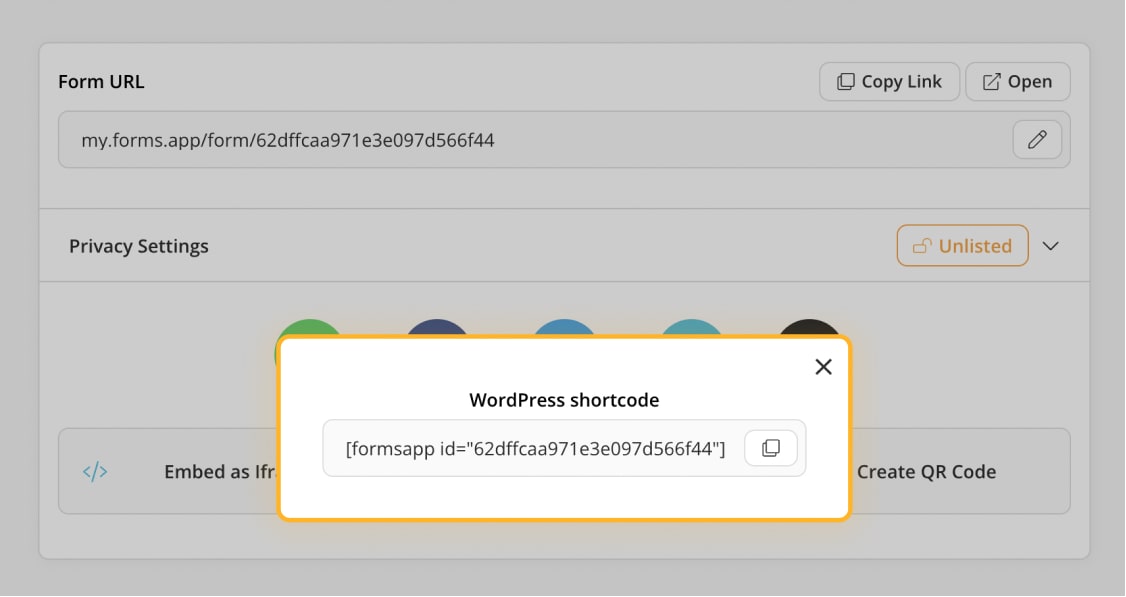
The first method to share your form in WordPress is to embed it using the shortcode. You may have heard of it before in WordPress, but what is a shortcode? Shortcode is a small code written between two brackets to make a feature work. It allows you to embed pictures, forms, videos, and so on. Now that we have defined what shortcode is, it is time to move on to the following steps.
1 - Open the share page on your form
2 - Click on the WordPress icon on the bottom right
3 - Copy the WordPress shortcode
4 - Open your WordPress site and your pages
5 - Add new page
6 - Paste the shortcode on the page
Embedding with a HTML code
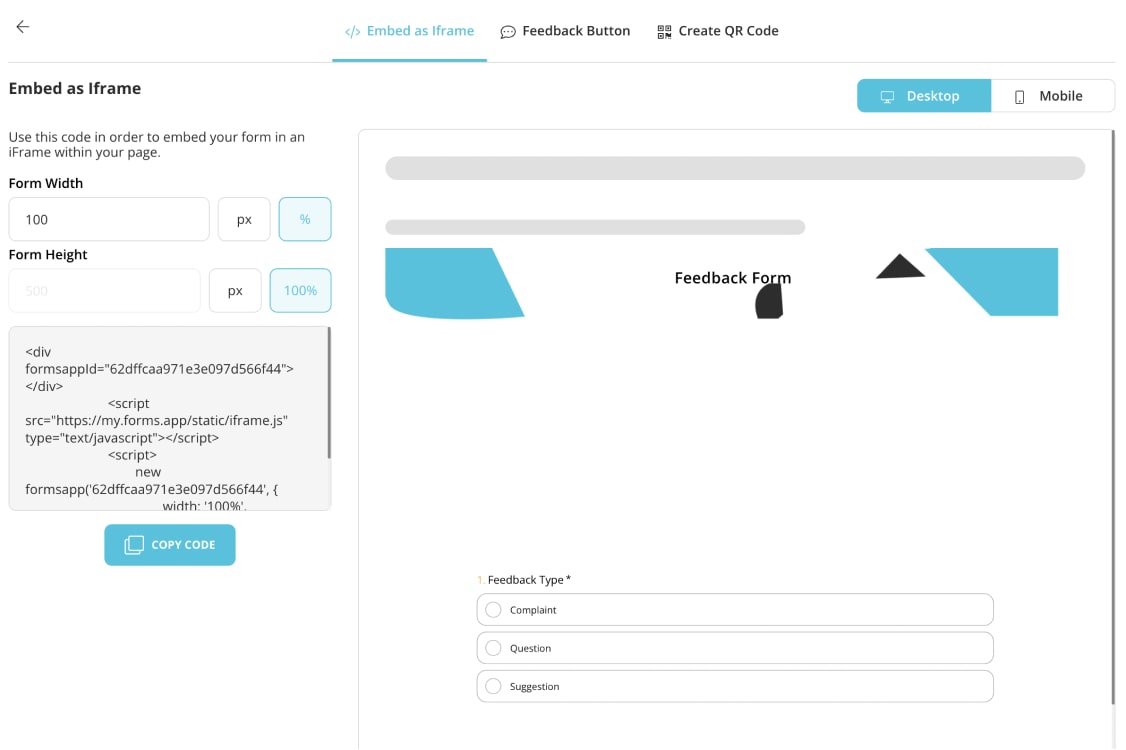
The first method to share your form in WordPress is to embed it using iFrame code. The IFrame is short for the inline frame, it is an HTML element used to embed a page into another page. They are useful and used not only in WordPress but in other sites too. You can embed your form with iFrame by following the steps below.
1 - Open the share page on your form
2 - Click on Embed as Iframe on the bottom left
3 - Adjust the form width and form height, and on the right side, you will be able to see how it will be seen on desktop or mobile after your adjustments
4 - Copy the code
5 - Open your WordPress site and your pages
6 - Add new page
7 - Paste the HTML on the page
Templates to use when creating your WordPress forms
You can speed up your work by using ready-made templates in forms.app when creating forms for WordPress. These templates are customizable; whether you use the template as it is or not is up to you. There are hundreds of ready-made templates, but some of them, like website contact forms, product order forms, quote forms, and email sign-up forms, are most useful for WordPress sites.
If you want to learn how to create a custom WordPress contact form or create quote forms you can read our articles to learn how to create specific forms for your WordPress site. And if you are new to online business, you can check our article about using order forms to sell online. If you want to get started right away, you can use the templates below:
Conclusion
We showed you how easy it could be to create online forms, the importance of templates to start with, further steps to improve your WordPress forms, and how to easily embed the forms you create into your WordPress site by using a shortcode or an iFrame code. Thanks to these forms, you will now be able to communicate more easily with your site visitors, and they will provide you with positive feedback. Do not wait any longer; follow these steps to create your own form and share it on your website!
Atakan is a content writer at forms.app. He likes to research various fields like history, sociology, and psychology. He knows English and Korean. His expertise lies in data analysis, data types, and methods.


 7 min read

