Google Forms is a popular platform among internet users and is frequently used to create online forms to get feedback. For this reason, many people must view and share the forms created to collect feedback and data. Make your Google form public to reach people, speed up your feedback collection process and conduct extensive research.
So far, you may consider how to make a Google Form public. Although making your Google form public is possible, the procedures might not go as planned. Read on for more information and the steps you need to follow. Check out how to share Google Form with the public in this article.
What does it mean: To make a Google Form public?
Making a Google Form public means making it available without limiting recipients. Also, it means increasing the possibility that many people will view and click on the document. Keep an eye on the changes to your forms and evaluate them. Let's look at what making your form public can do for you.
How to make a Google Form public
First of all, start with creating a Google Form. Log in to your Google account by signing in to Google. Choose a template on the dashboard. Customize it and make the changes as you wish.
After finishing all the settings in your form, click the send button above. You will see mail, link, HTML code, and social media options in the share menu that appears. You can share publicly by choosing one of these options.
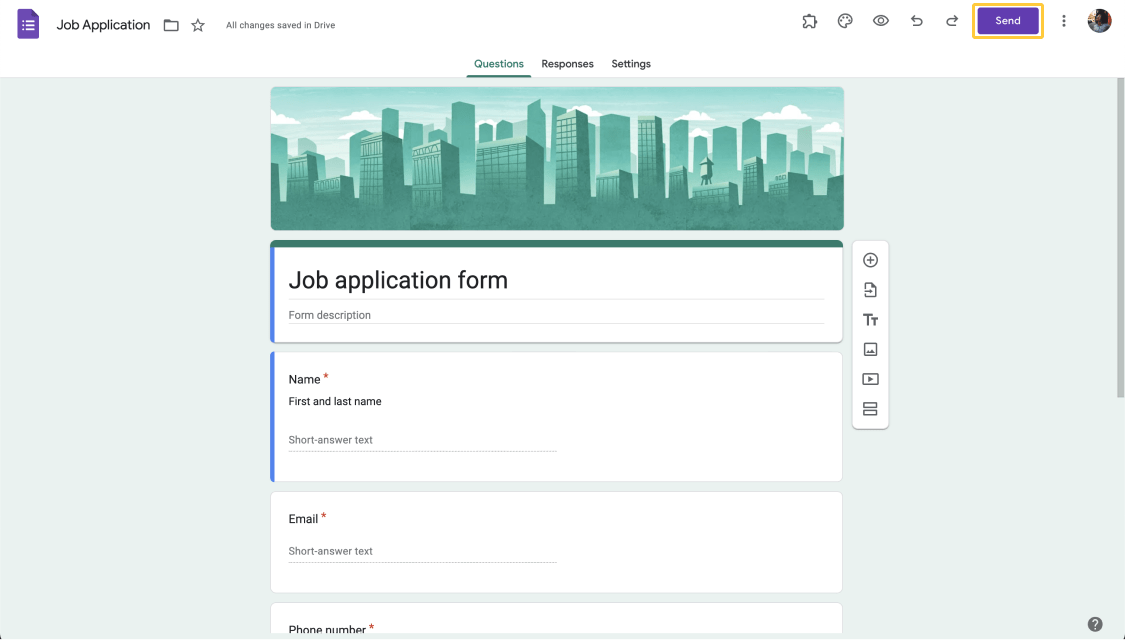
Click on “Share” on Google Forms
How to make a Google Form public but not editable
Viewers can fill out the form via the shared link but cannot change it. However, add them as collaborators or editors when submitting your form. You can enable recipients to modify and edit it.
Sharing the URL link or sending it to the recipient emails allows them to view the form. Briefly, sharing your form publicly will only be editable if you add them as collaborators or editors.
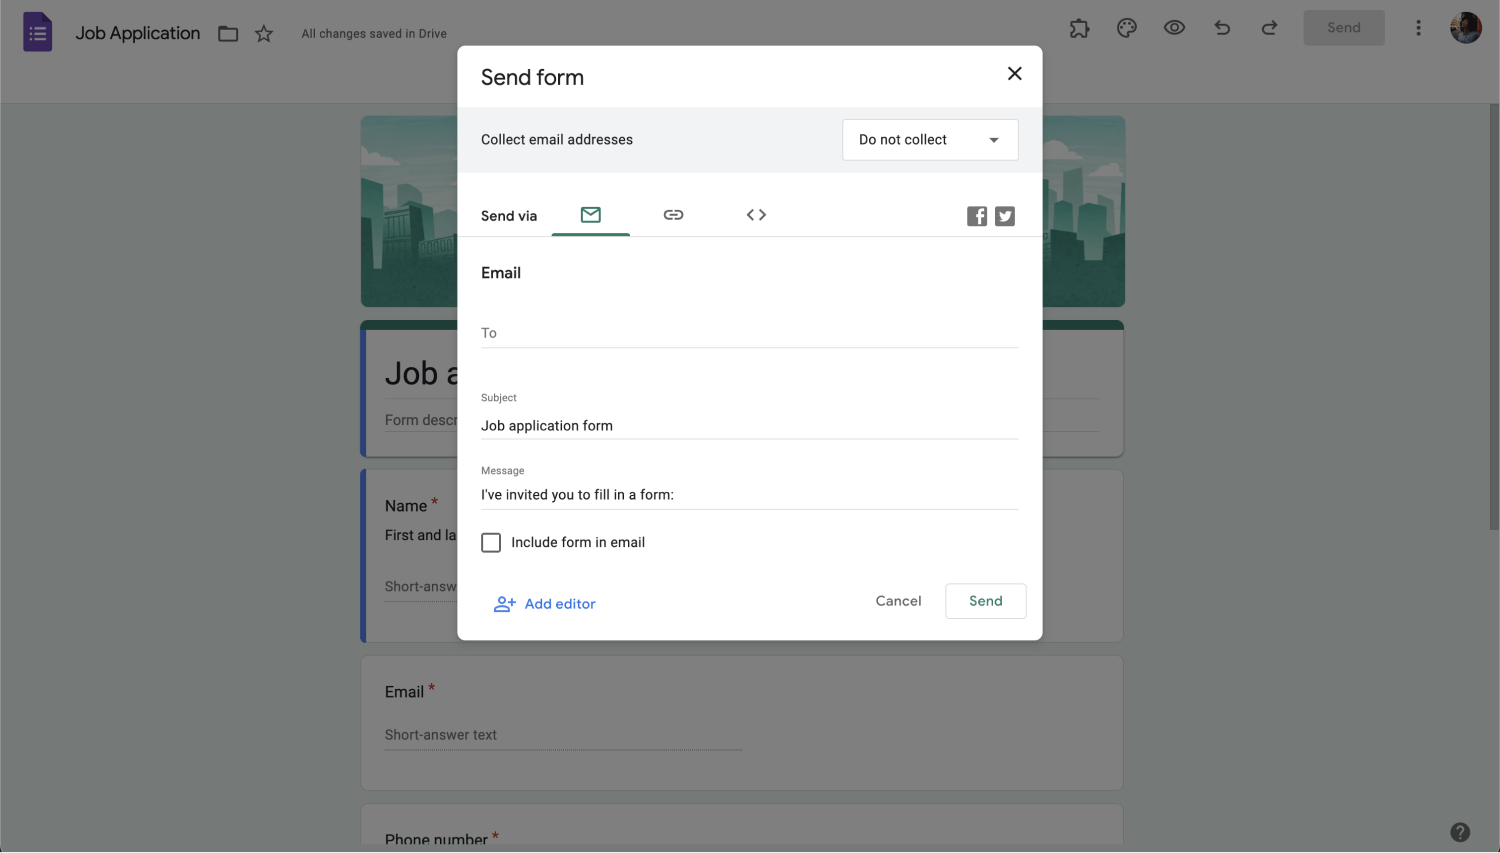
Share your form via form link
How to invite collaborators to edit your forms
You can share your form with colleagues if you operate in a team and often communicate. So, they may change and modify it regularly.
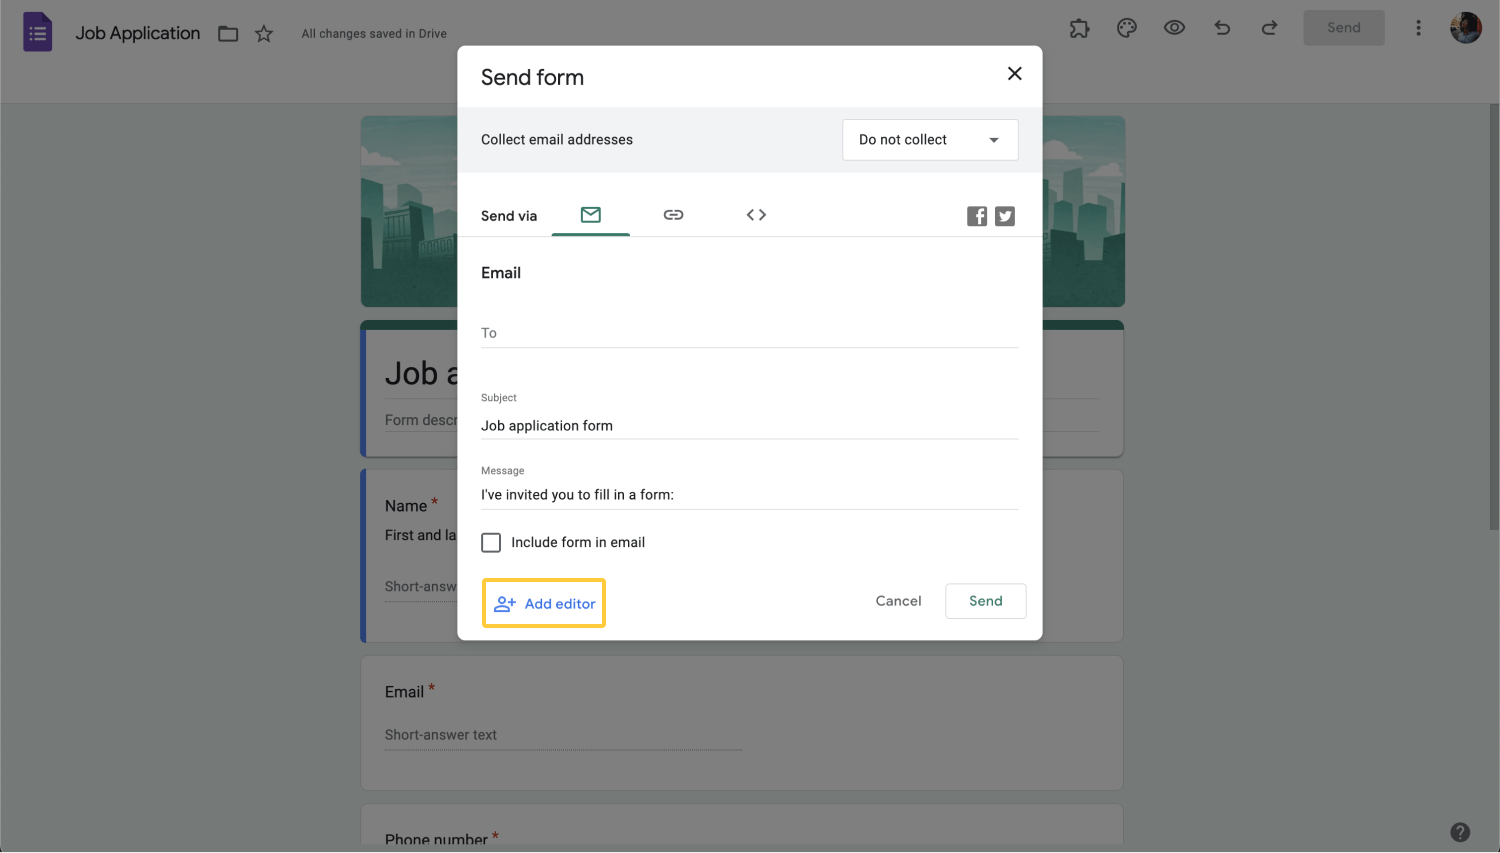
Click on the “add editor” option
To share specifically, you can activate access by clicking on the add editor section at the bottom of the mail option. Choosing this option, you can share the Google Forms or Google Docs via the link in different ways. Here are the sharing types:
1 - Restricted access
Entering the email addresses of people you decided in add editor field, you can restrict access to your form. These people you add can view your form and make changes to it. when you want to change them later, you can add or remove editors.
2 - Group access
It is possible to provide access to your form to a group in your company, organization, or circle of friends. Add their accounts and pick them as viewers or editors. Click on add people and groups, select the mail of the group you created, or add the people's emails directly.
3 - Access with the link
Click on anyone with the link option in the general access section, copy the link, and send the form to people. Anyone on the internet can click the link to the form. Also, editors will be able to open the form and delete the Google Form responses.
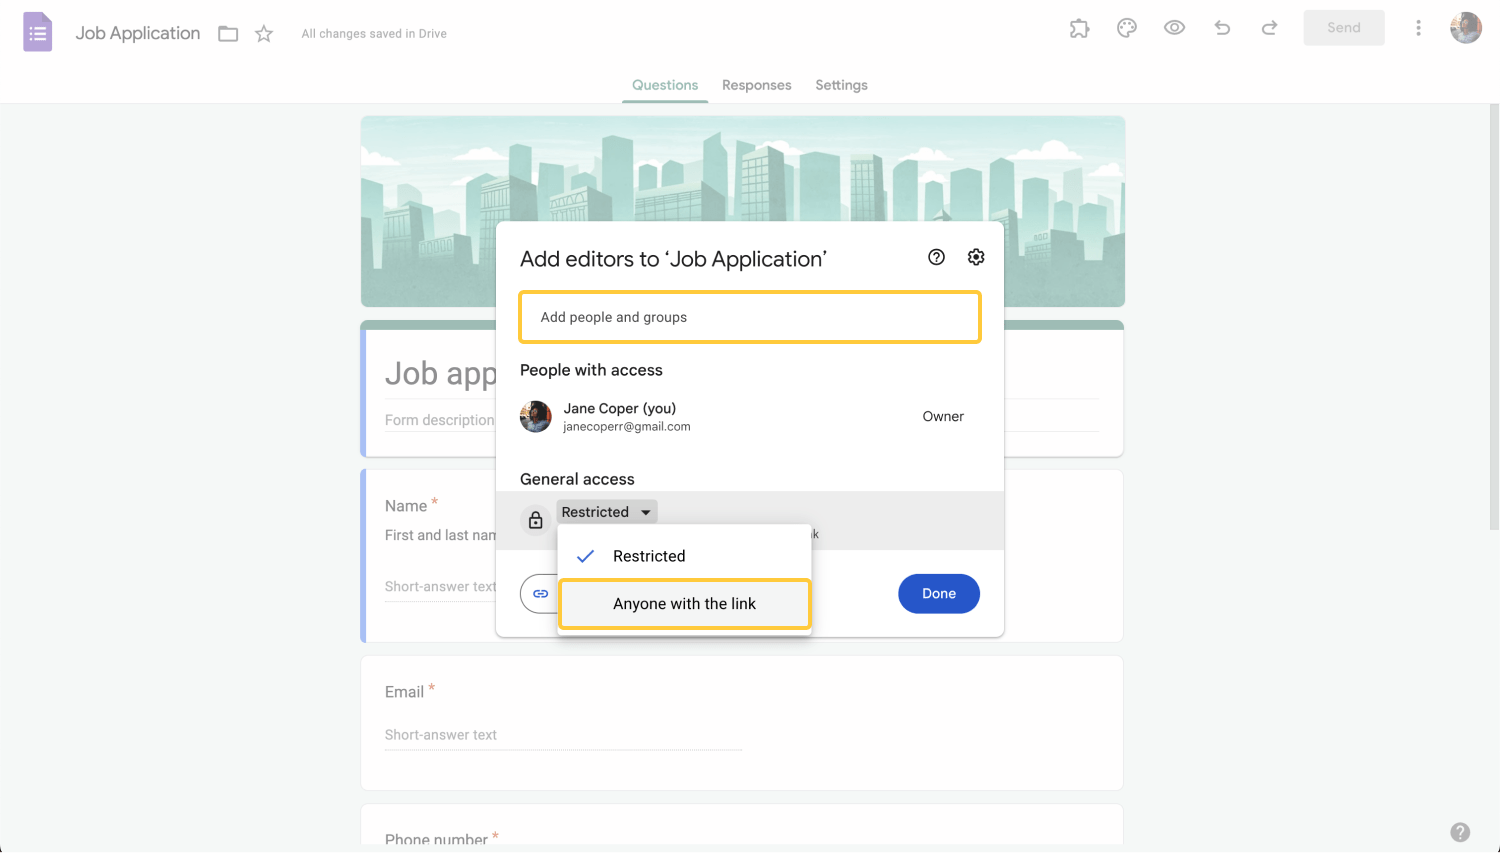
Choose an access level
Is there a better alternative to Google Forms?
Because Google Forms needs more transparent and practical settings for limiting access to your form, you risk wasting time and speed. The better alternative is only a click away from making your form public with a single button.
forms.app offers a platform where you can publicly share your form using free templates and various features. It is simple to gather feedback and data without having to deal with challenging steps. The details below are for you if you want to take advantage of these opportunities.
How to make your form public on forms.app
Start building your form with a template related to your chosen theme. Change, remove or add new questions.
Design by choosing the background and colors. You can add images or logos related to your form. Once you've finished creating your form, you're ready to share.
1 - Make your form public with the share button on the top right. You will see the link to your form on the page that appears. Sharing this link via e-mail, social media platforms, and QR code is possible. Also, you can copy the HTML code and embed it on your website.
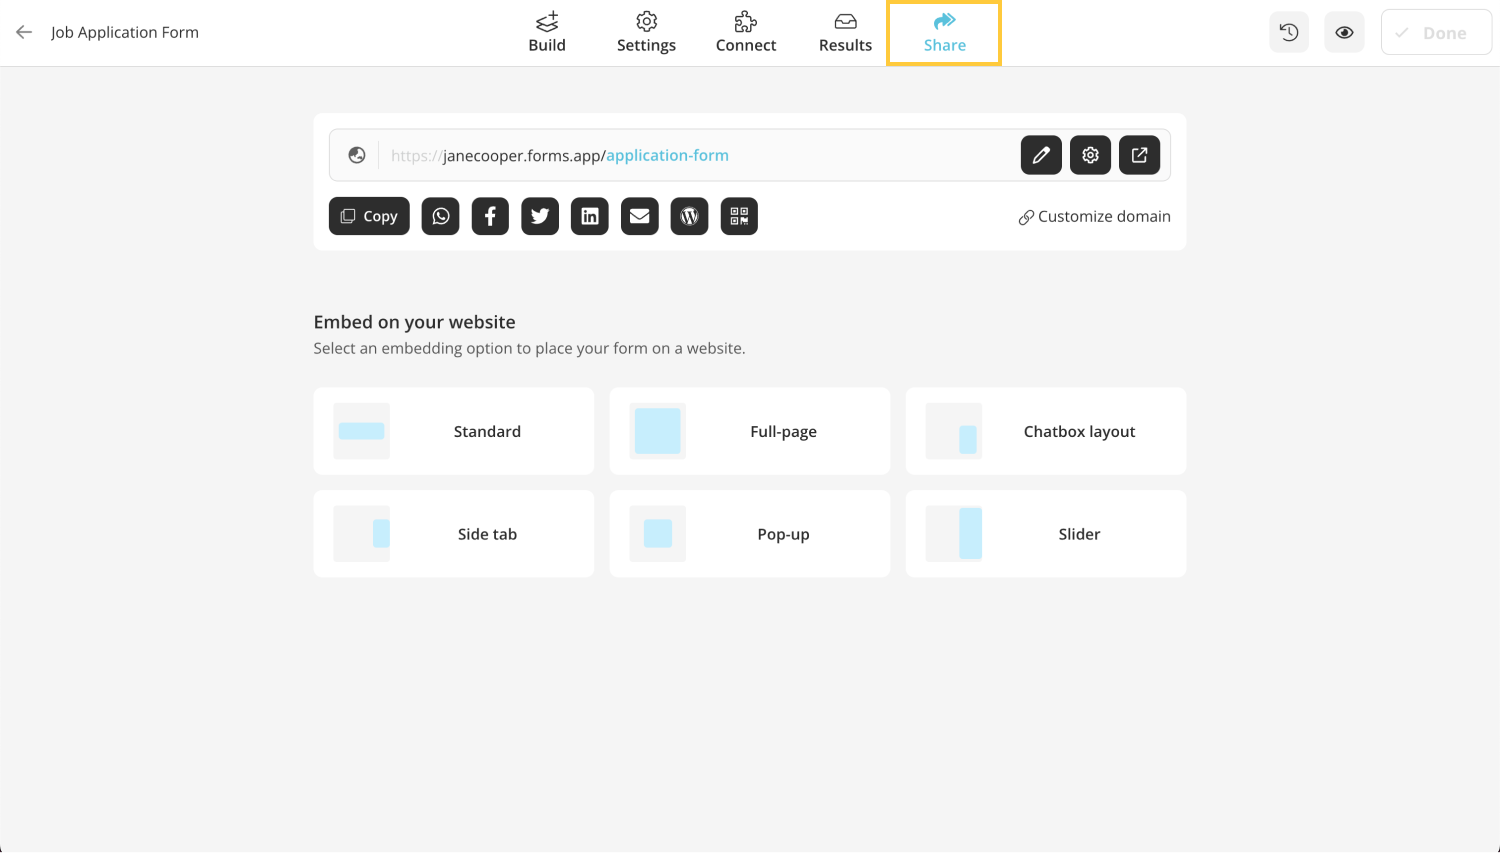
Go to the Share panel on forms.app
* * *
2 - Click on the settings box next to the link. You will see 3 different options in the privacy settings section. You can easily make your link public by clicking the public button. By activating the button below, you can allow search engines to index your form.
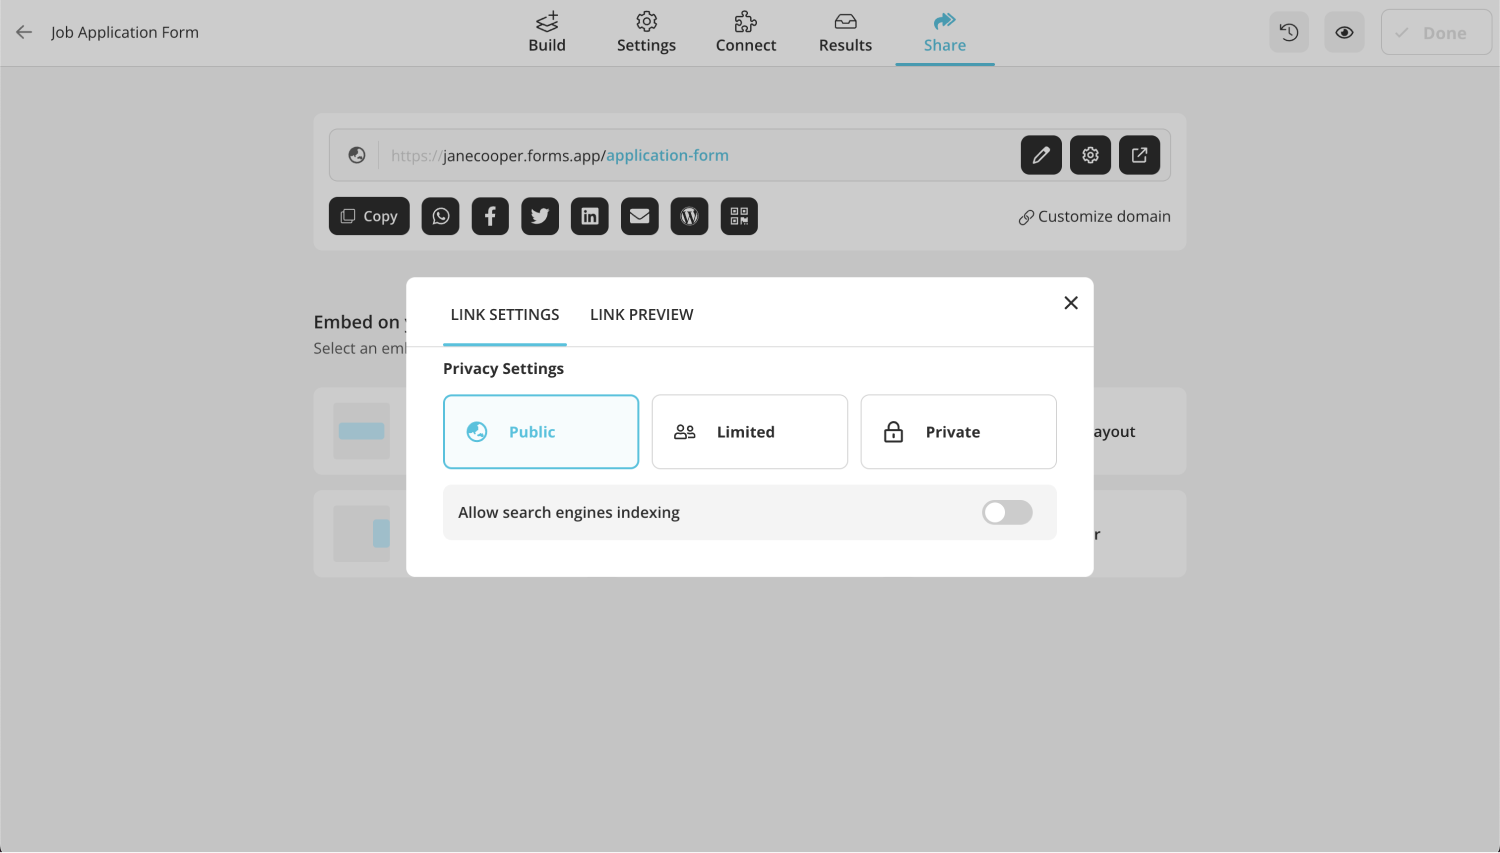
Change privacy settings
* * *
3 - If you want to use the limited option, it will be enough to enter the e-mail addresses of the collaborators. Recipients can view or edit the form. Make your job easier by copying the link and sharing it with your colleagues or groups.
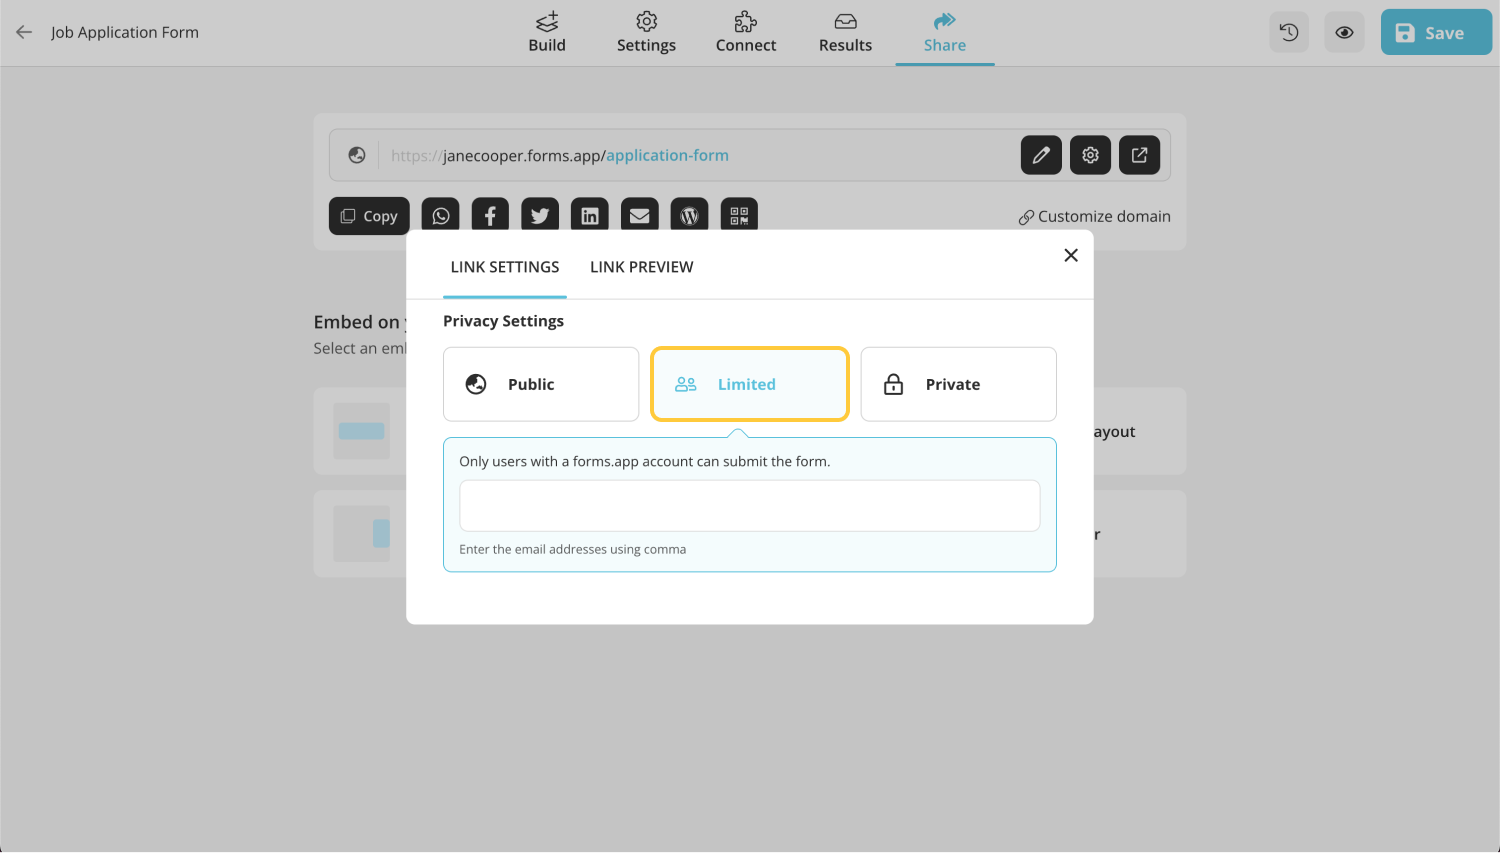
Limited access
* * *
4 - When you use the private option, you make your form so that only you can edit it. Entering any time, you can effortlessly and quickly change your form, revise, and save it. After then, you can change the private property of the link according to your wish and share it with the public.
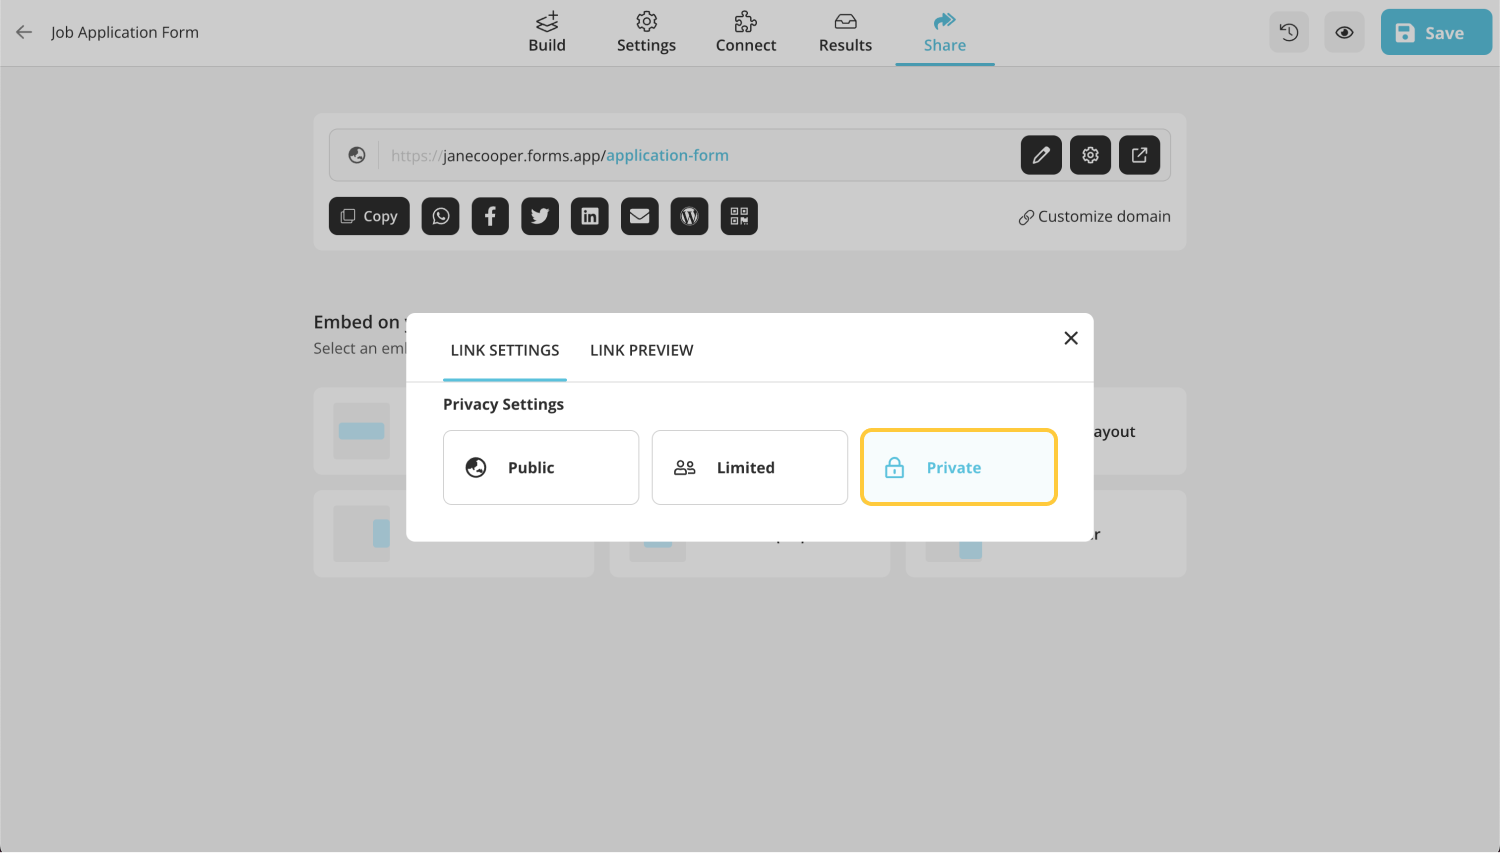
Private access
How to add collaborators on forms.app
Once you register for a forms.app account, you will receive access to diverse options. Being able to share your form with collaborators is one of them.
To add collaborators, here are the steps:
1 - Go to your forms.app profile and click on team members at the bottom left. Here, you can see your teammates, and you can add more people by clicking the invite members button.
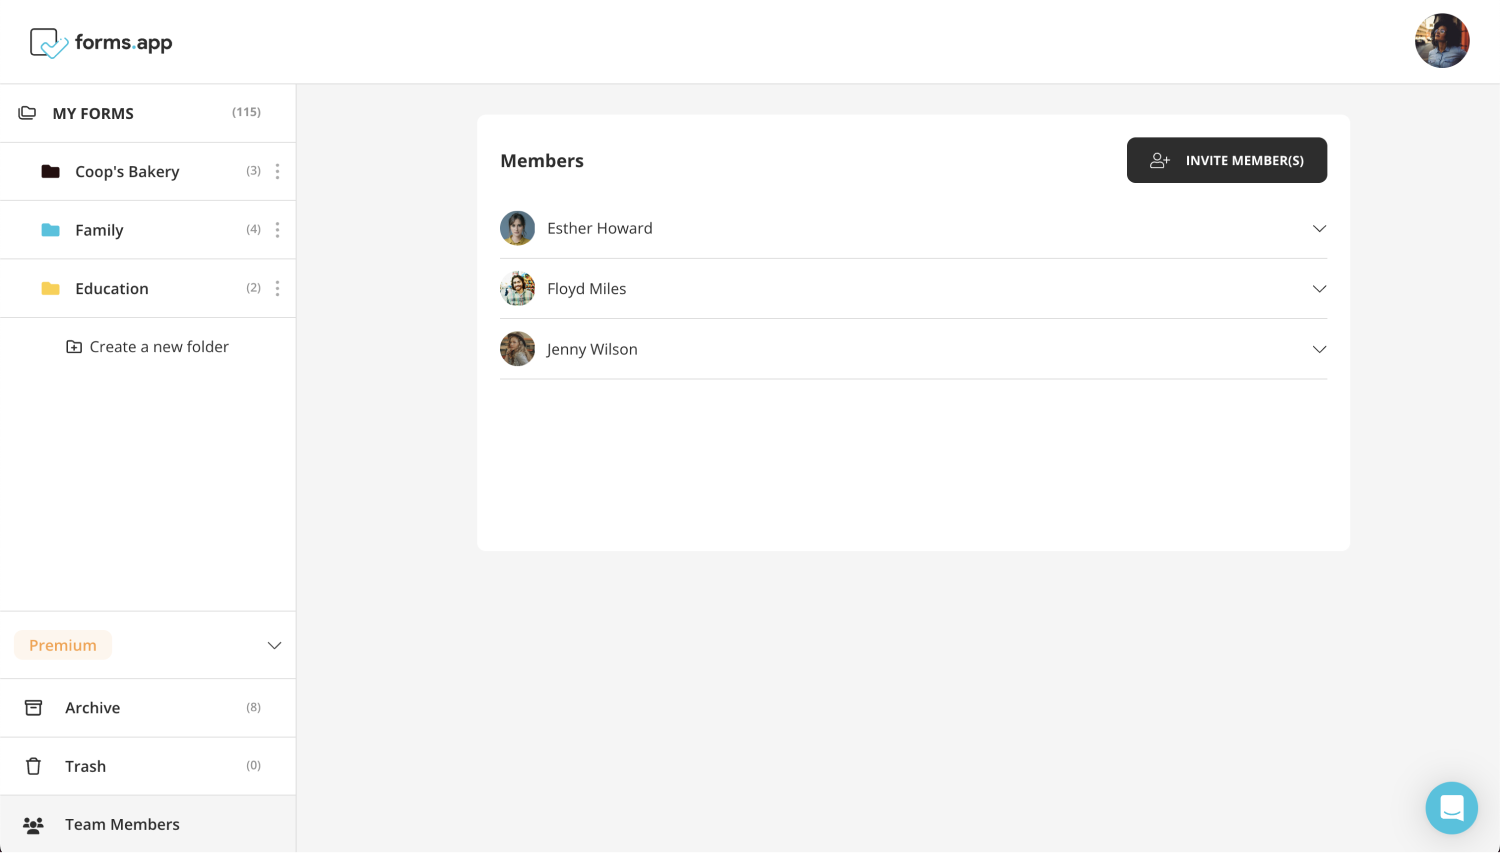
Click on “Team Members” on forms.app’s dashboard
* * *
2 - Choose the folders and the member(s) with their emails in the relevant field. Team members may be selected as viewers or editors; you may change their positions later.
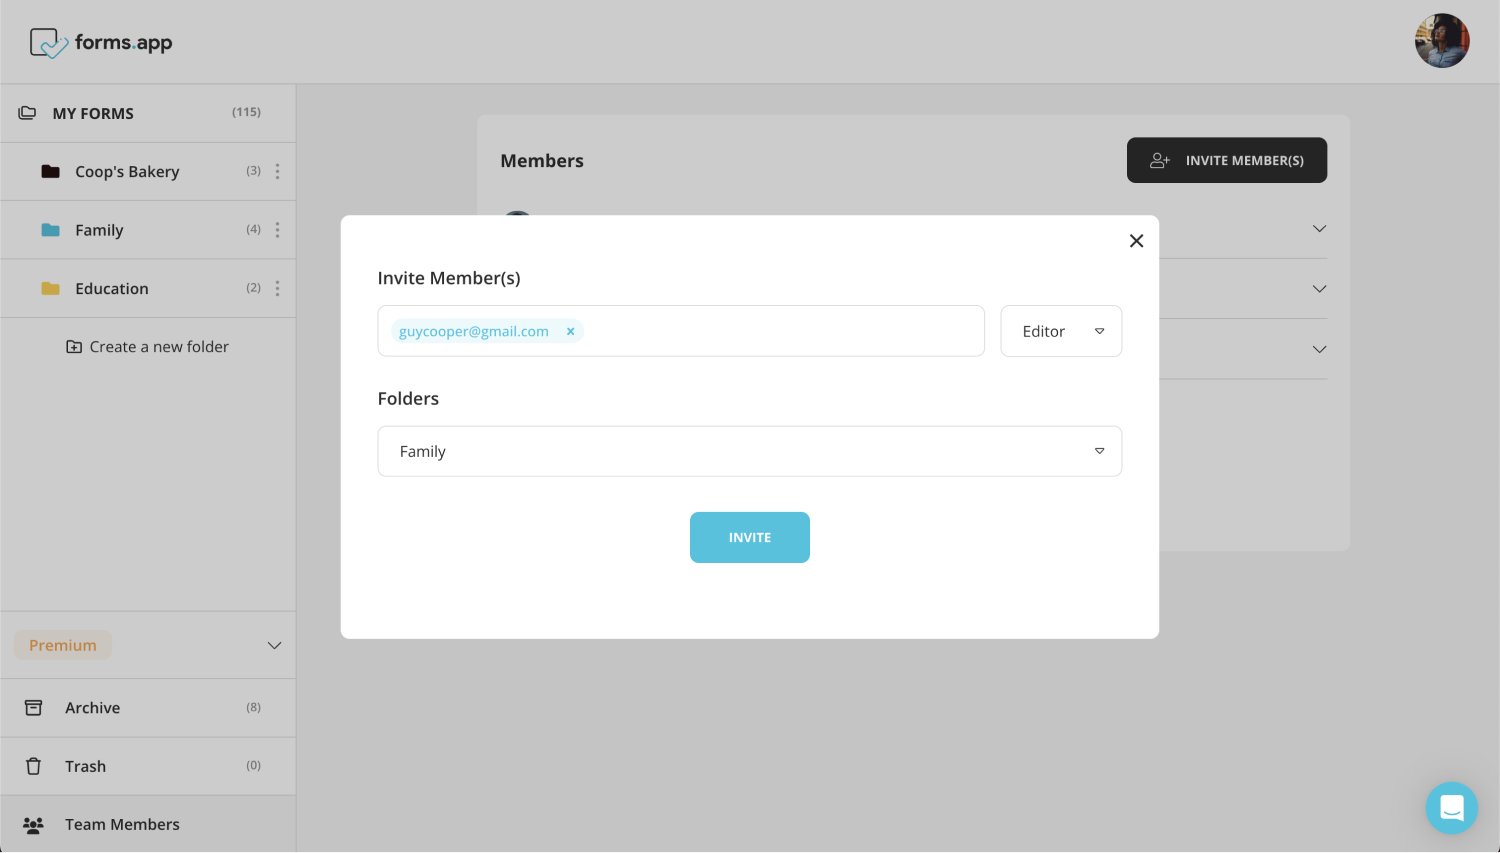
Add folders and members
* * *
3 - Finally, click the invite button and send an invitation e-mail to the members.
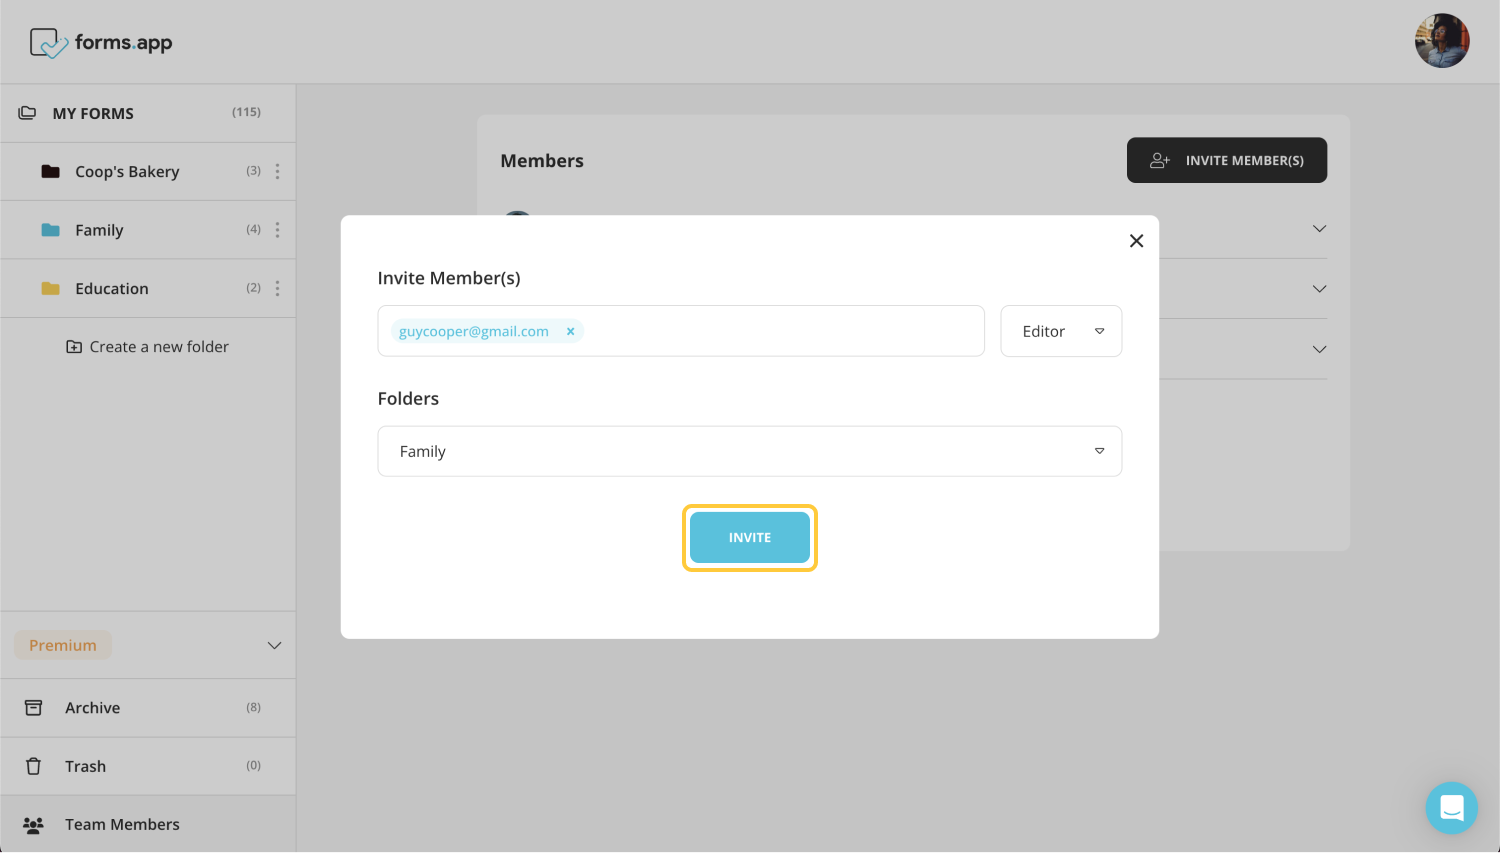
Send the invite
Wrapping it up
To summarize this article, things may not go well when creating, customizing, and, most notably, sharing forms on Google Forms. It may be good for you to take advantage of an alternative platform. forms.app offers you to use many different editing items and share your forms the way you want without hassle.


 5 min read