Are you tired of grading tests and forms by hand? Do you wish there were a more straightforward method for assessing answers and giving real-time feedback? Google Forms is one of the tools you can use. If you're a teacher, a business owner, or anyone else who wants to collect and assess information, you may create self-grading tests and forms using its automatic scoring system.
In this blog post, we'll discuss automatic scoring systems, how to create a Google Form self-grading and some basic techniques for building effective quizzes and forms.
A self-grading Google Form can speed up the workflow and offer valuable insights whether you're aiming to evaluate your students' knowledge, get customer feedback, or obtain information from your company.
What is an automated-scoring system for quizzes and forms?
It is becoming increasingly crucial for businesses and educational institutions to create and distribute quiz scoring systems and forms effectively as they shift toward online and remote learning. That's where automated-scoring systems come in.
An automated-scoring system is a tool that uses algorithms and rules to evaluate responses and assign points based on correct answers or other criteria. These systems can benefit educators, businesses, and individuals who must collect and analyze data quickly and accurately. Education, research, and customer feedback surveys are all settings where automated scoring systems are used.
One of the most popular automated-scoring systems is Google Forms. With Google Forms, you can easily create self-grading quizzes and forms, saving time and effort, especially when dealing with many responses. By setting up your form to automatically calculate scores, you can provide immediate feedback to respondents, saving you the hassle of manual grading.
How to make your google form self-grading
There are several ways to make Google Forms helpful in this matter, but creating a self-grading Google Form can return the favor in the form of self-grading. However, there is still no application for this feature. We are going to create our own manually that allows the real potential of Google Forms’ assessment to shine.
1. Turn your form into a quiz
First, you need to go to Google Forms and click on the + icon in order to create a blank form, or you can even choose the template from their gallery. After creating one, you need to click on the “Settings” section at the top, and in the section “Make this quiz,” toggle the switch to “On”
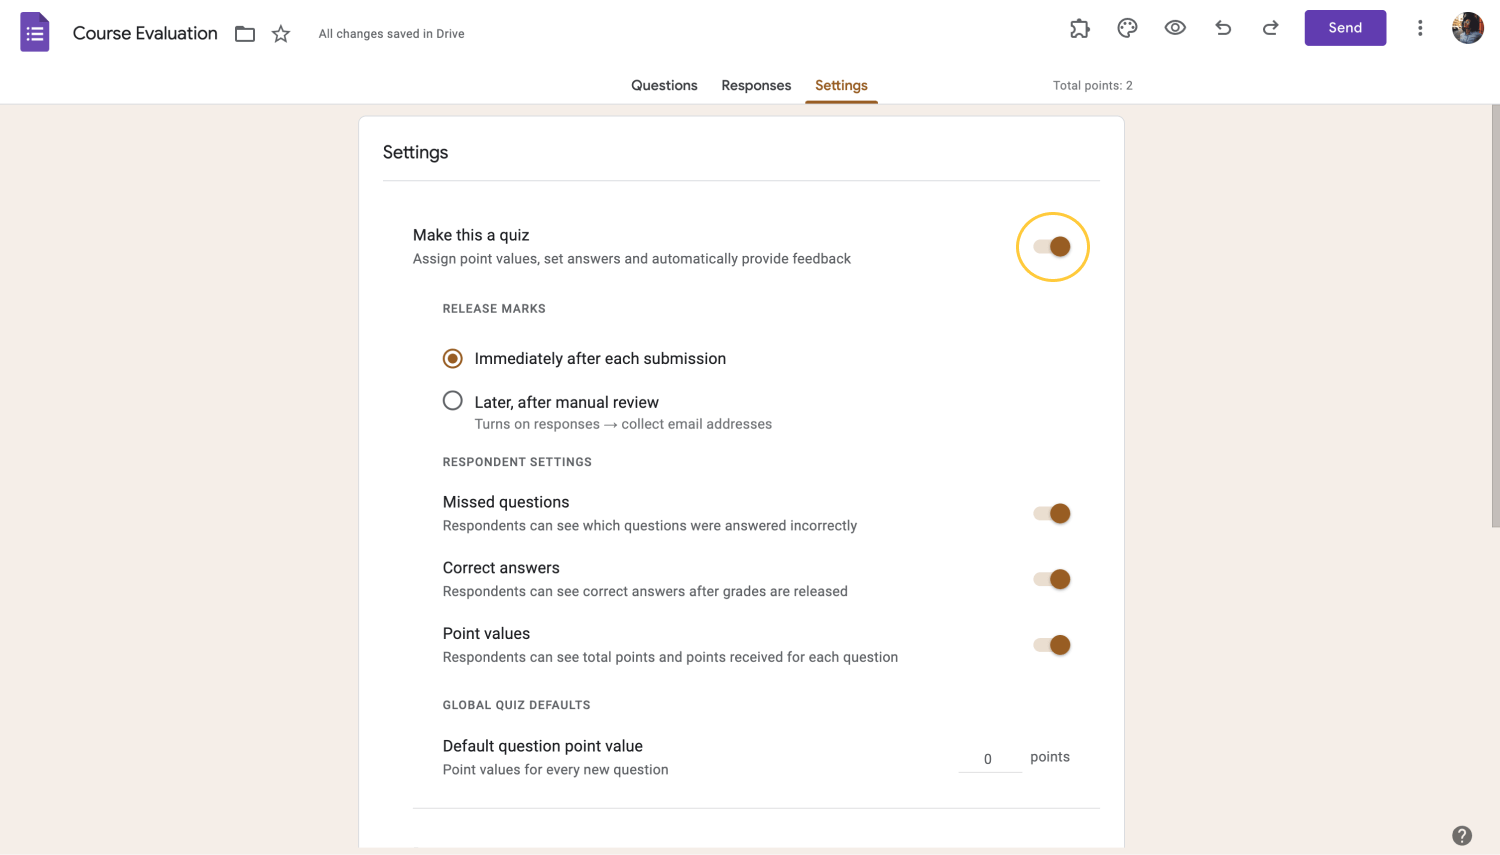
Turning your Google Form into a quiz
2. Adjust the settings
You can adjust other settings while you are at it. It is also possible to specify a preset question point value and decide how soon quiz results should be released. You can also toggle the respondent settings to "On" or "Off." depending on if you like to let quiz takes know their scores. In addition, you can share the assessment with other people in your department, school, etc.
3. Create an answer key
It is time to make an answer key and assign points that you want to how many points a person should get for each answer option chosen. Based on their answers to your quiz questions, you can provide some kind of feedback. For instance, this feedback can be a thank you message regarding your final score, which tells you whether you are eligible or not, higher or lowers score points, etc., or an instant one showing which answer is correct.
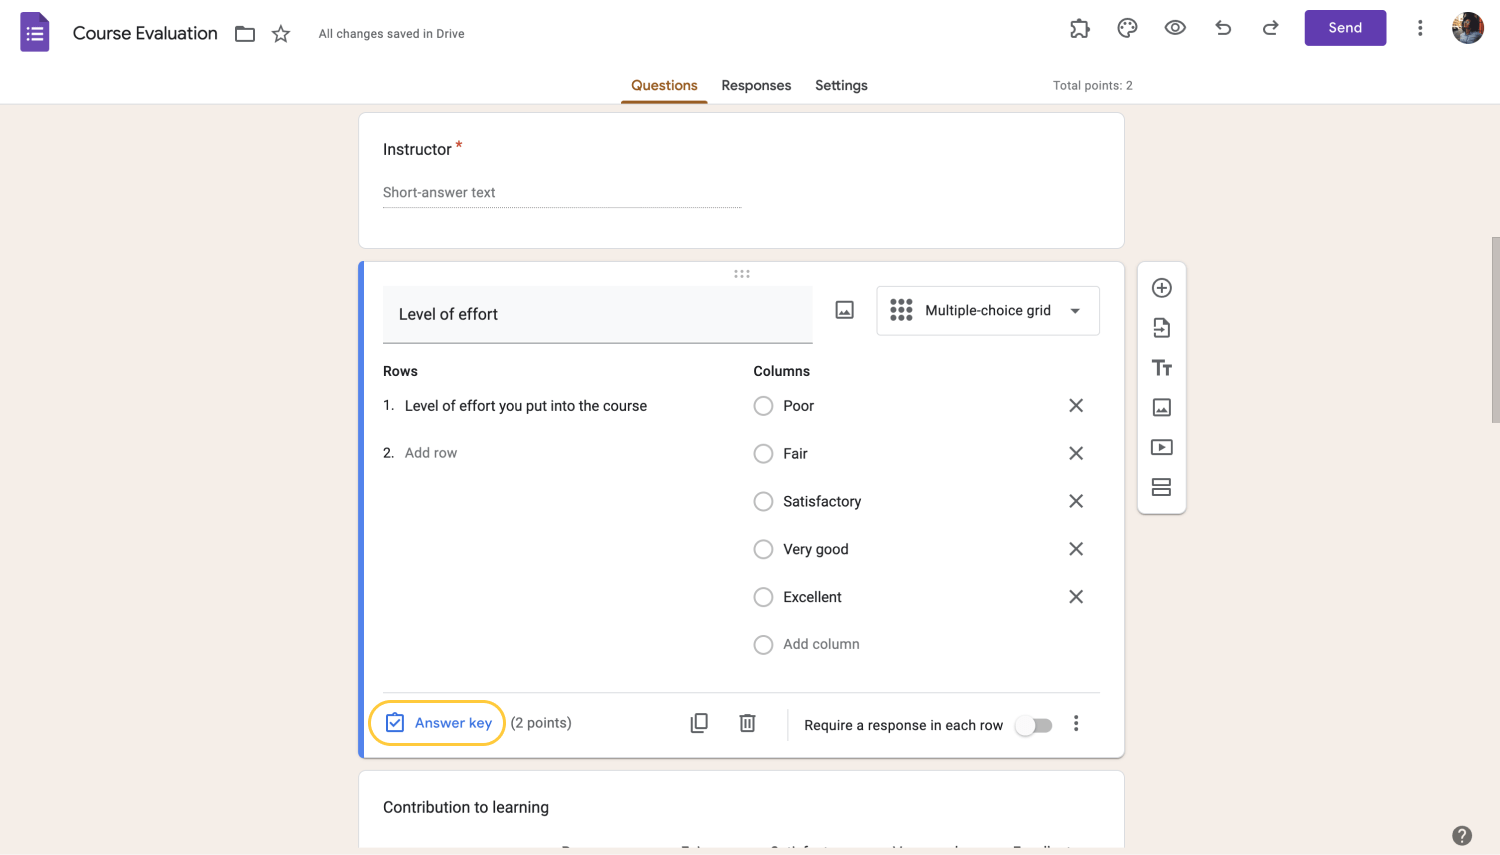
Adding an answer key to your form
Here are the question types you can create an answer key on Google Forms:
- Short answer
- Multiple choice
- Checkboxes
- Dropdown menus
- Multiple choice grids
- Checkbox grids
How to make an answer key in Google Forms
After deciding what type of question type you are going to use in your personal Google Forms, you need to make an answer key to Google Forms to calculate the score. Below, you will find the procedures step by step of creating an answer key for Google Forms:
1. Click “Add question” on the top side of the menu.
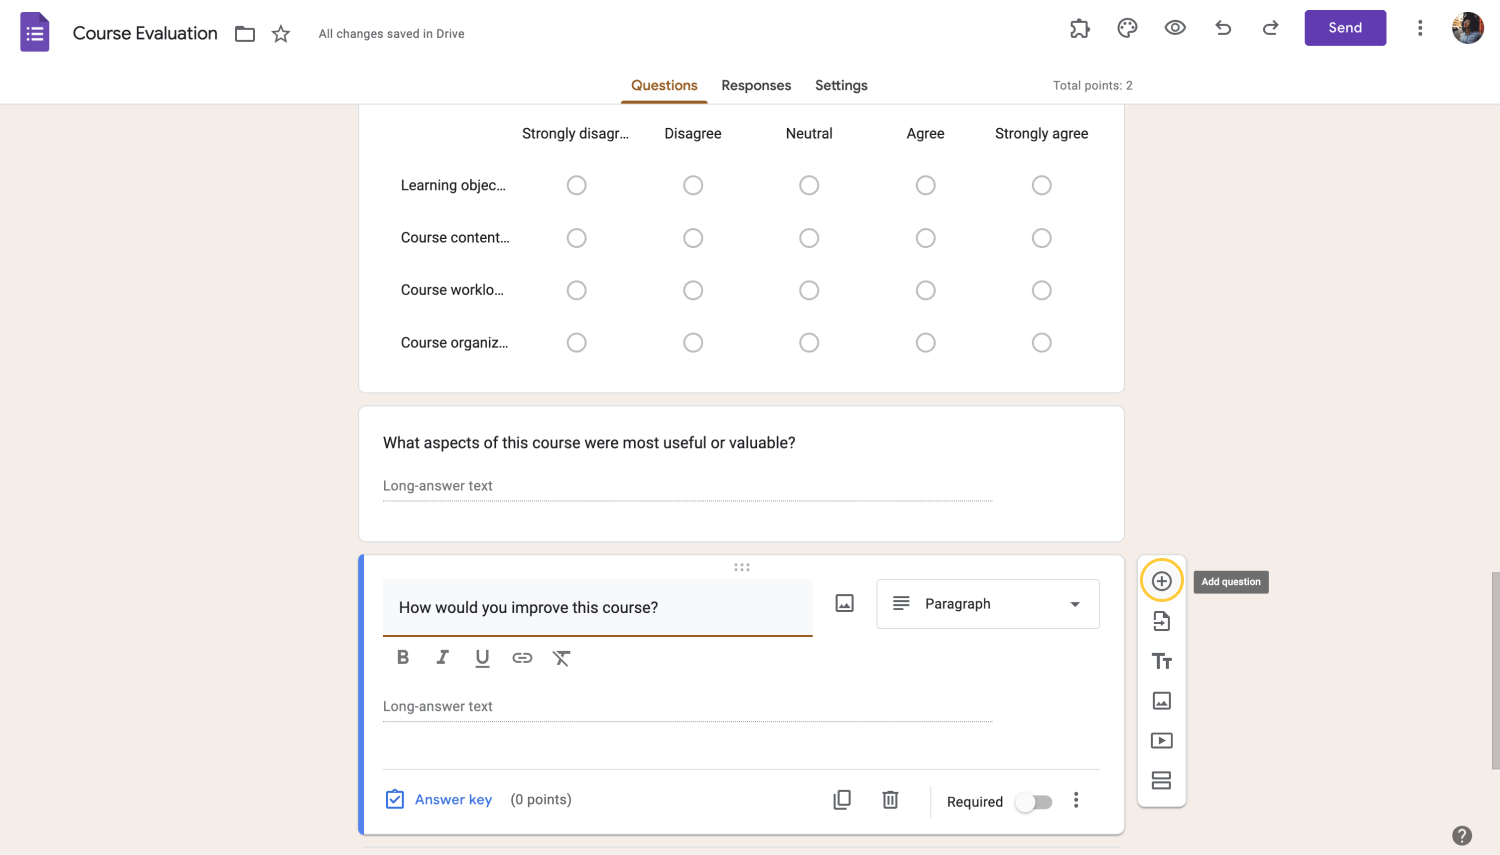
Add question
2. Input your question and answer choices. Toggle the "Required" indicator to "On" if you wish students to respond to the question before submitting.
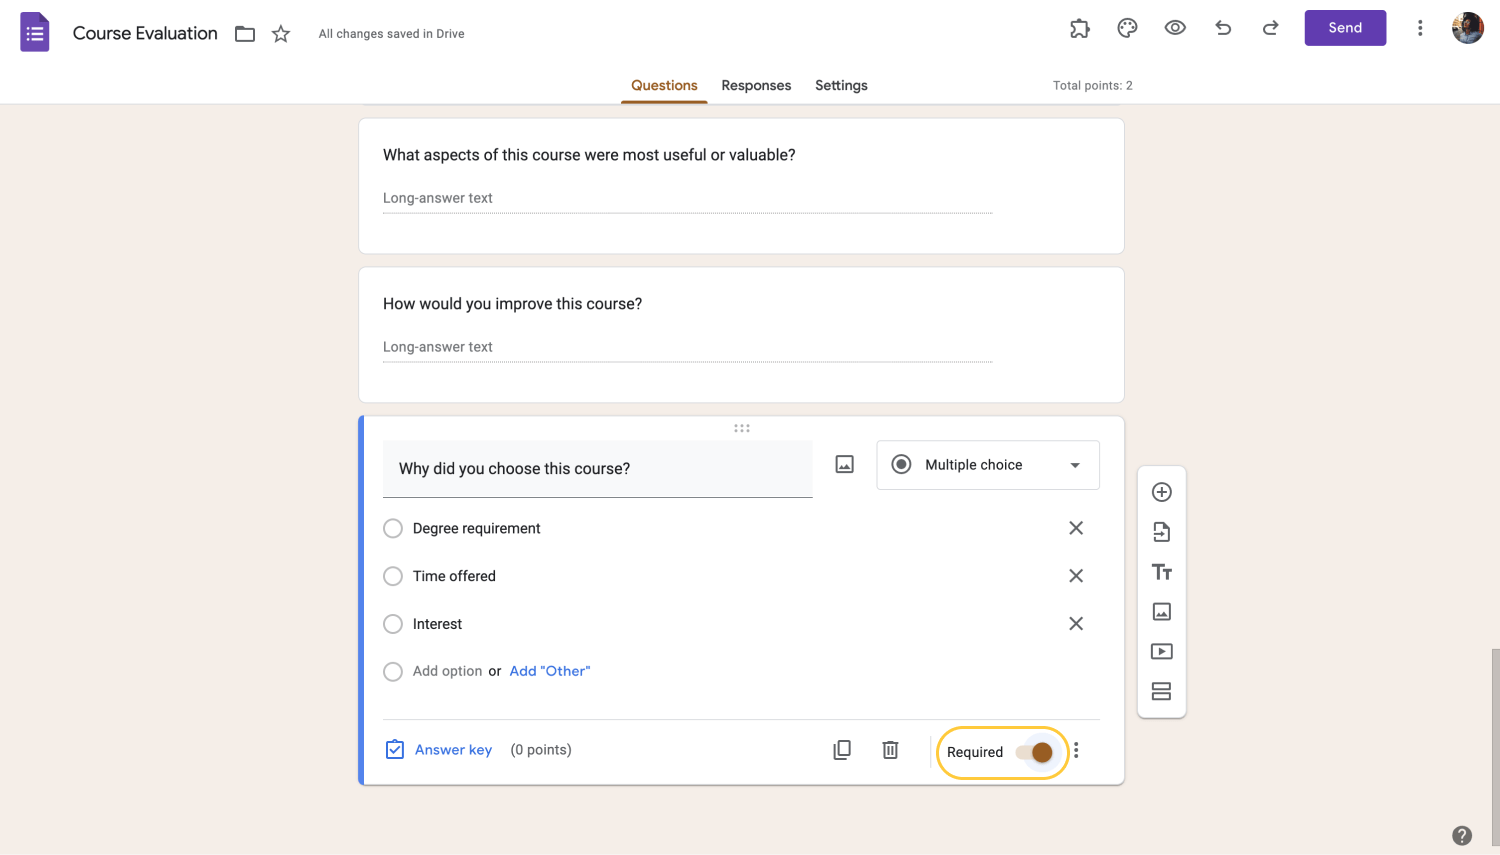
Choose if it should be required or not
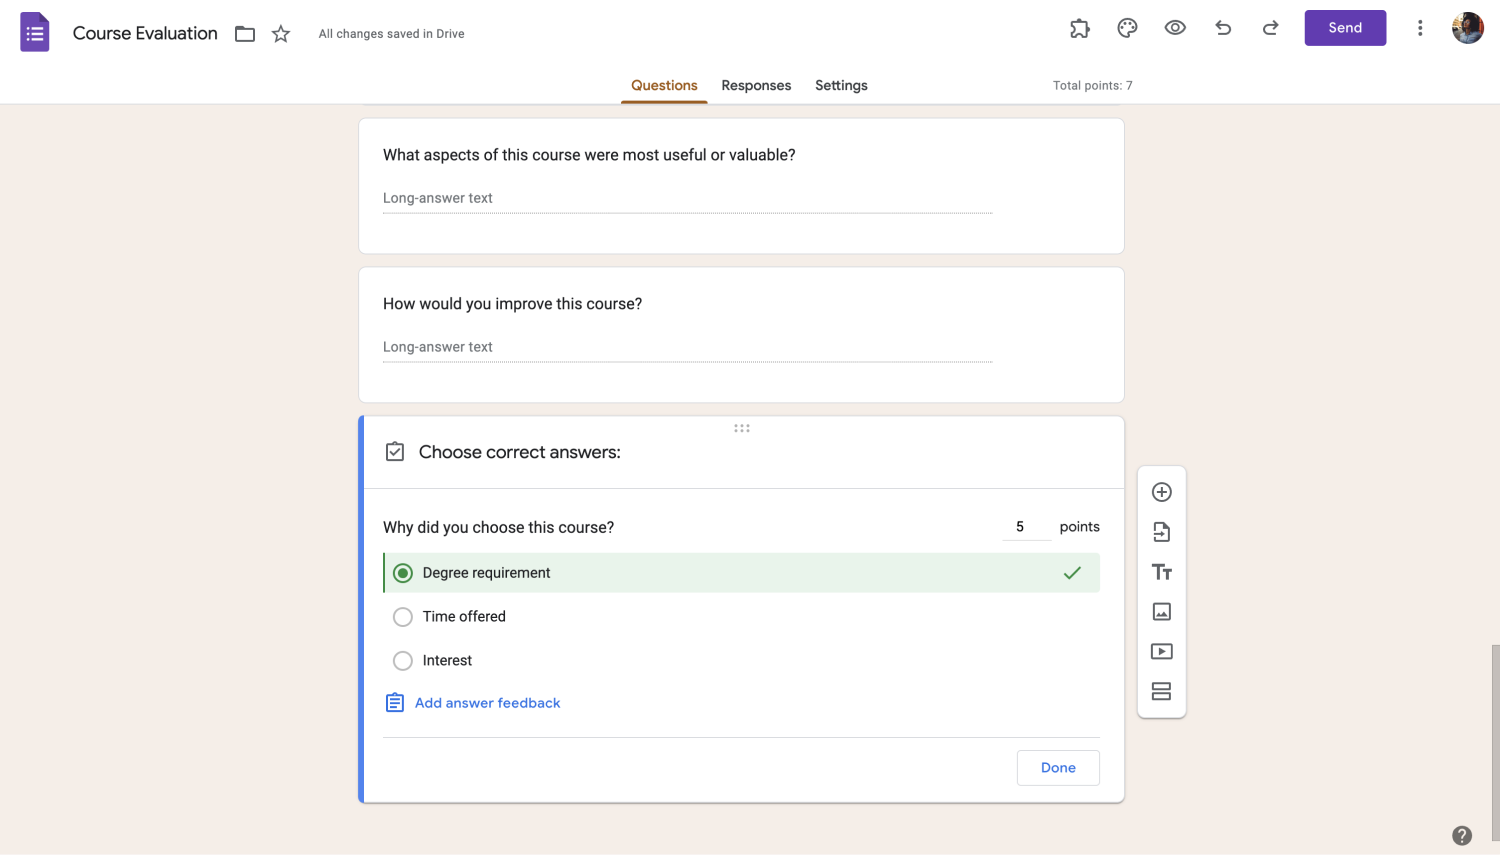
3. Click the "Answer key" in the bottom left corner of your question and then check the correct option. Each acceptable response may also be given a point value.
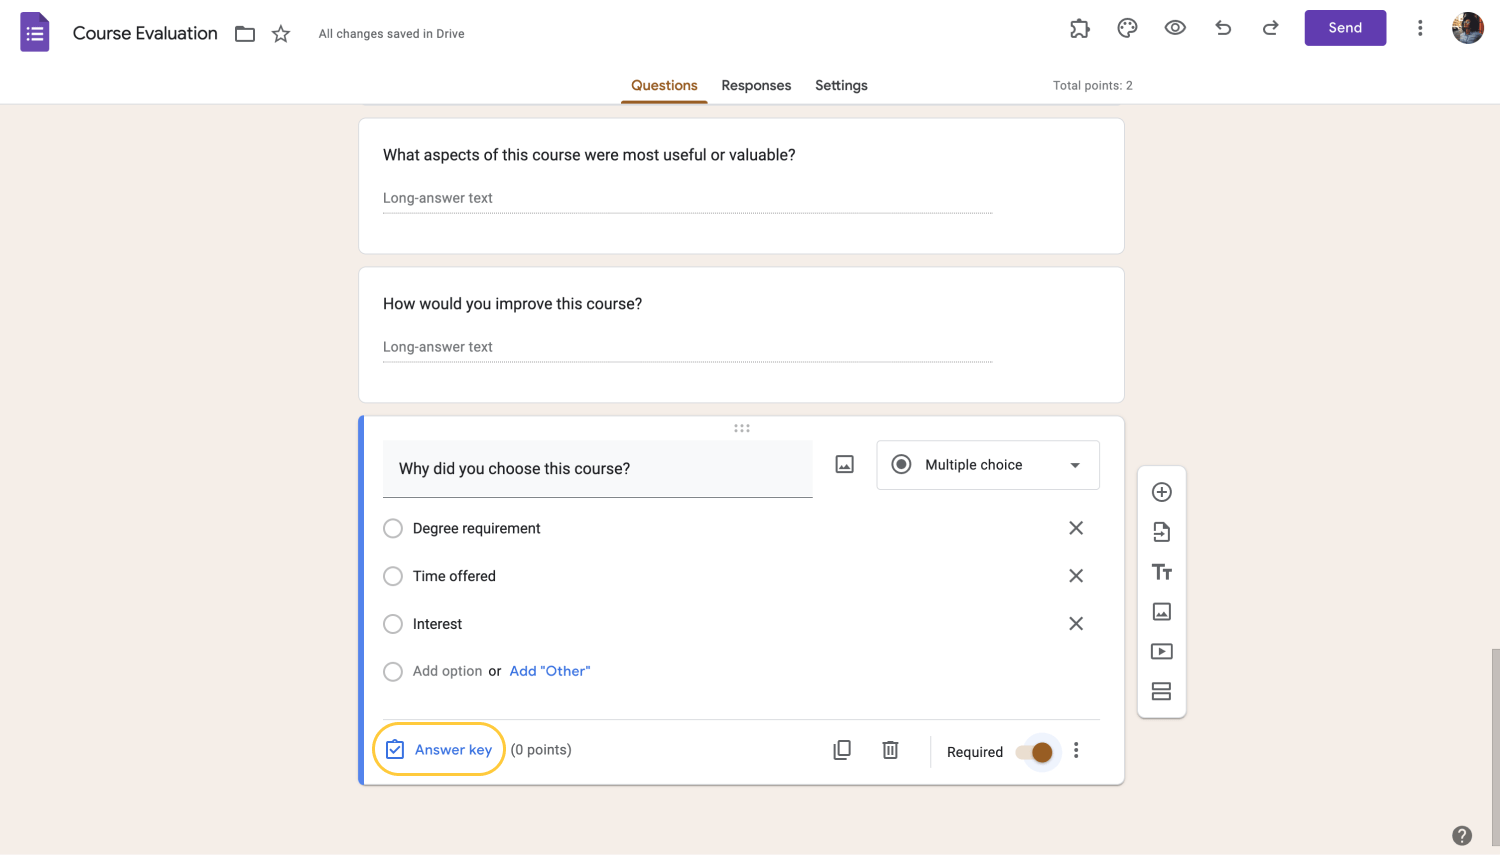
Choose the correct answer
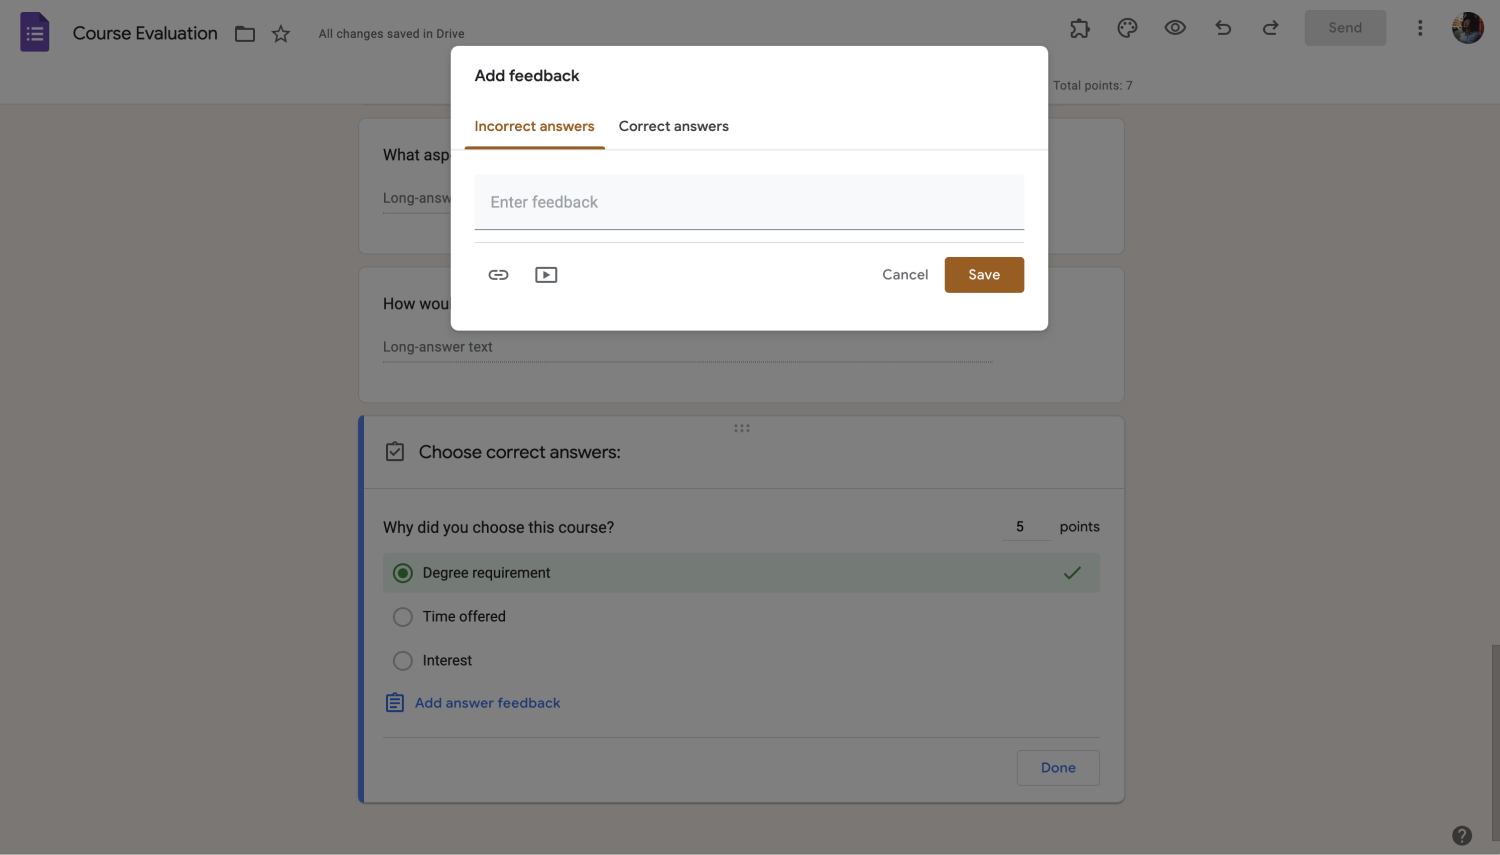
4. You can also add written feedback or provide other types of feedback to an answer. In order to do this, click “Add answer feedback” and add your corresponding explanation or other types of tools you want to use.
Add answer feedback
5. You can give marks and provide feedback on specific responses if you collect email addresses. Go to "Responses" in the form's top menu to filter by question or by a specific student. In the section next to each question, enter the exact number of points they obtained, and if necessary, add any additional feedback. Each time you evaluate a response, the adjustments you make are automatically saved.
Give additional feedback
Is there a better alternative?
Yes! There is always an alternative when it comes to software. Google Forms lacks in terms of question types and advanced features. So, if you need additional features, you have to look for an add-on, which won’t work properly most of the time.
Instead, you can try other form builders, like forms.app. It has many field types (more than 29!), customization options, and advanced features such as a calculator and conditional logic. Plus, it is completely free to hop on. Here is how you can use the calculator feature you can use for auto-grading on forms.app:
Calculator feature in forms.app
Once you add your questions and answers regarding how you wish you create your personal Google Forms, you may not find useful features there. For this reason, you can use forms.app’s calculator feature in your forms. You can follow these steps to use it:
- Go to calculator: On your form page, you need to click on the “Calculator” section at the top of the screen.
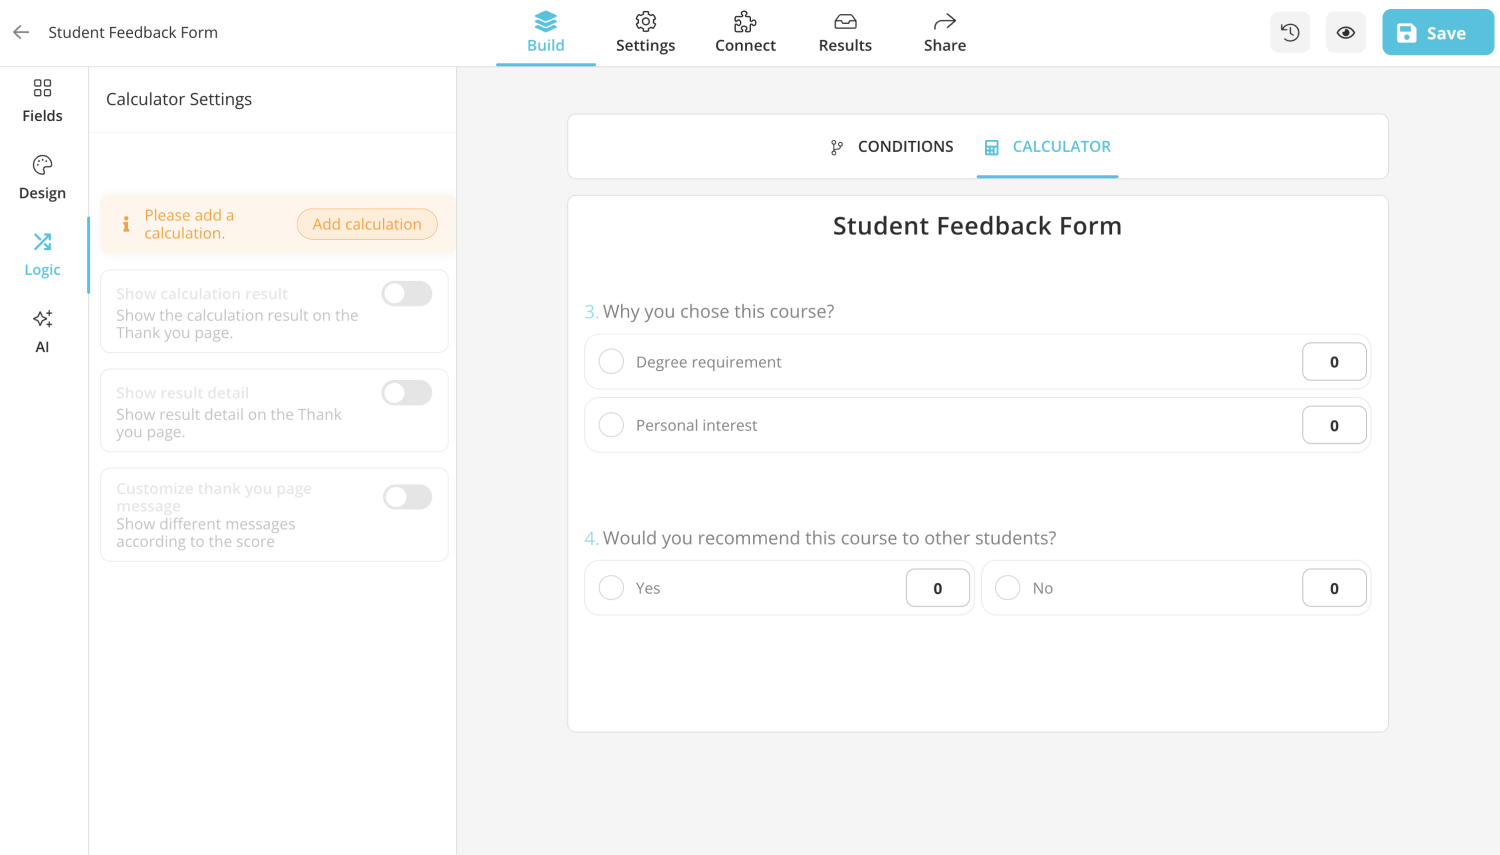
Open the calculator
- Add points to answers: After this, you can add calculations to your questions, quizzes, etc.
Add point values to answer options
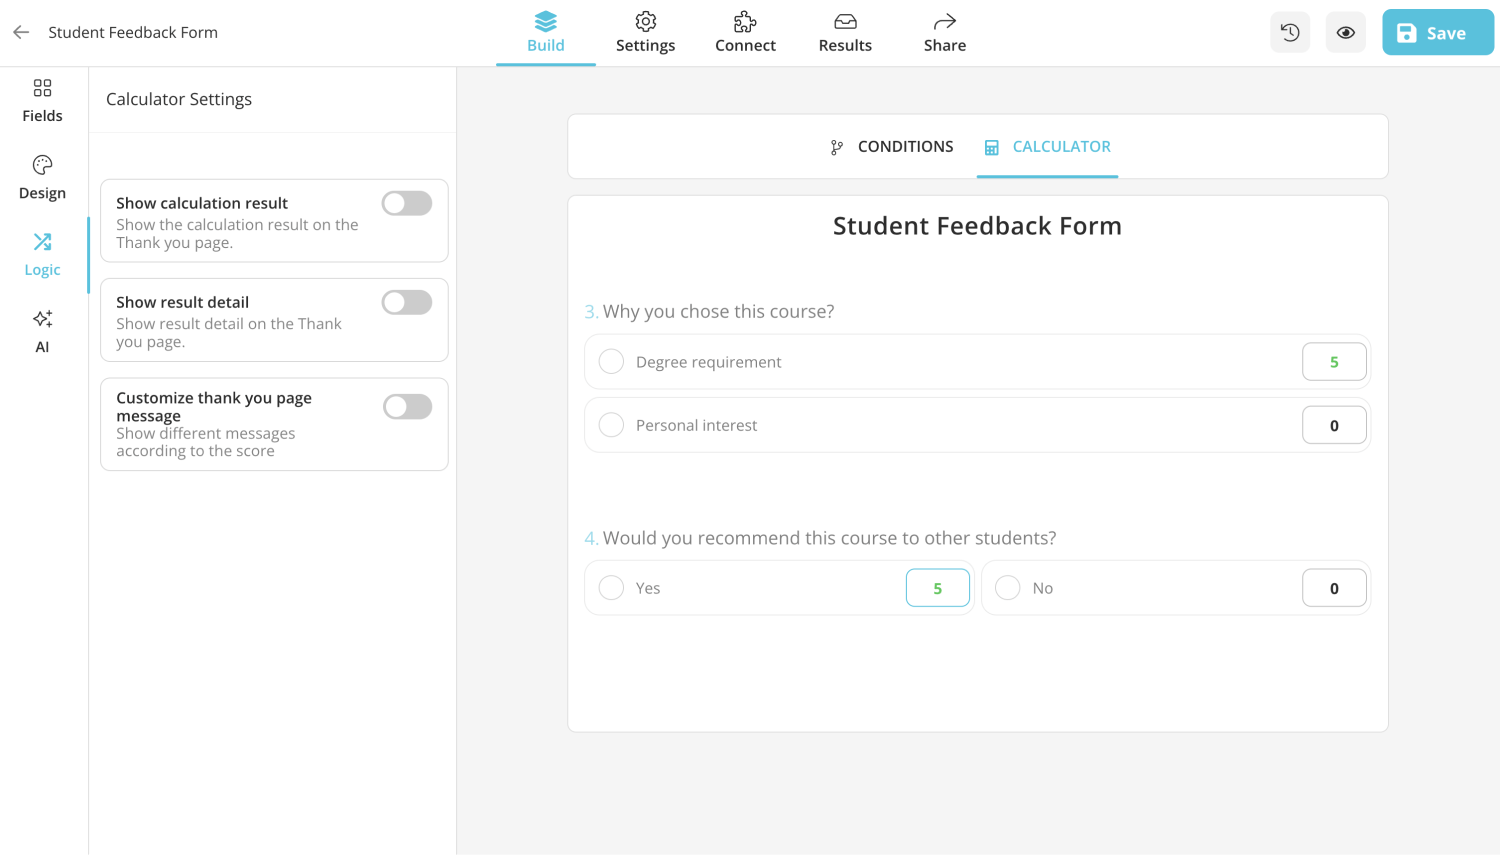
- Open calculator settings: These settings can be listed as; “Show calculations results,” which will show your score on the thank you page at the end of the quiz.
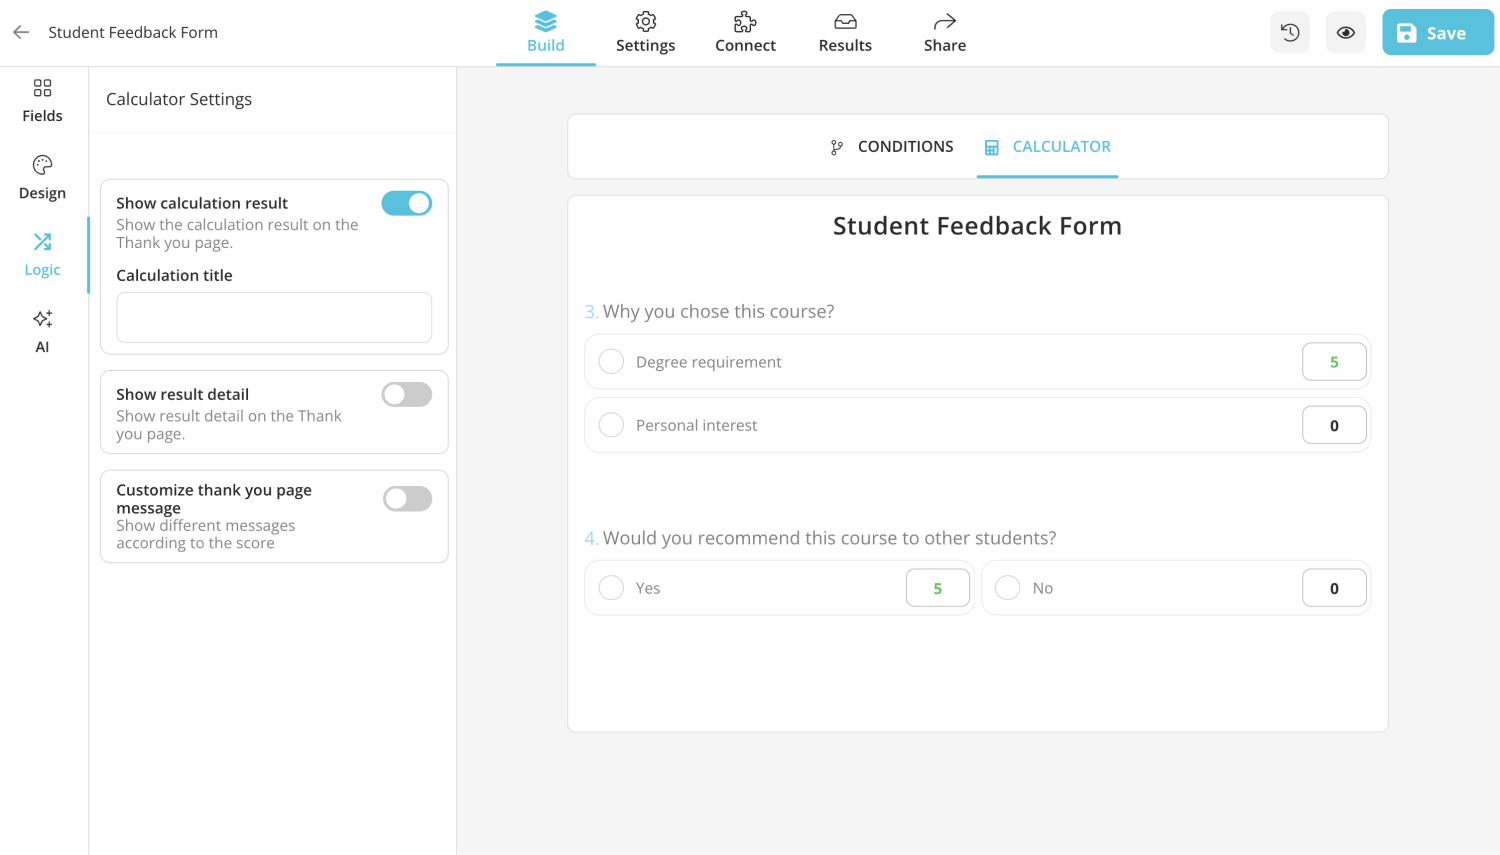
Open calculator settings
- Show details: Enabling the “Show result detail” setting will show your results in a detailed way.
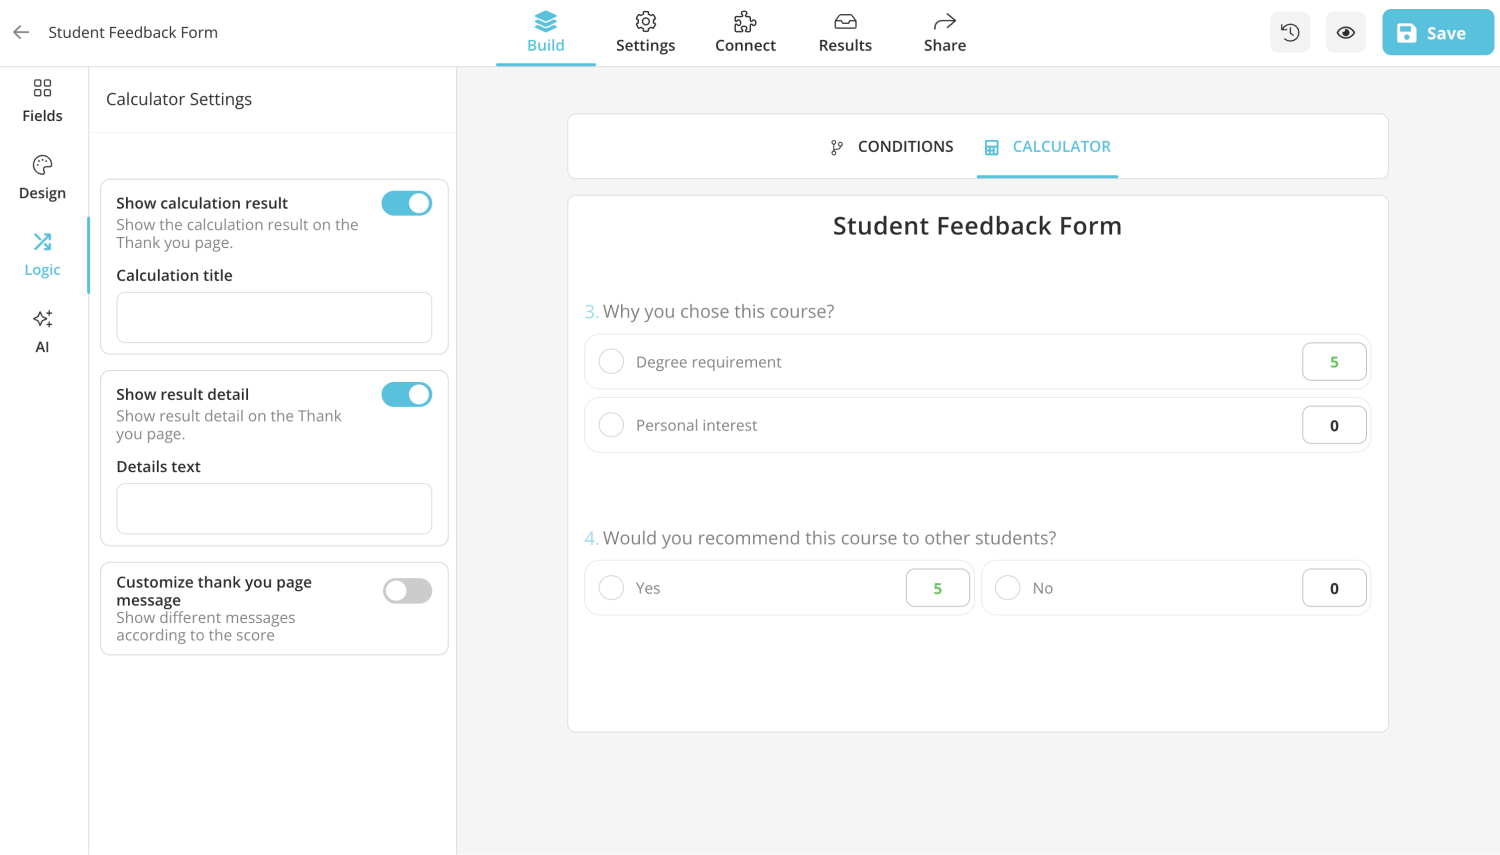
Show result detail
- Adding a Thank-you page message: “Customize thank you message page,” which allows you to customize a thank-you message regarding your final score, and you can create a personally written message for those who successfully completed the quiz or test.
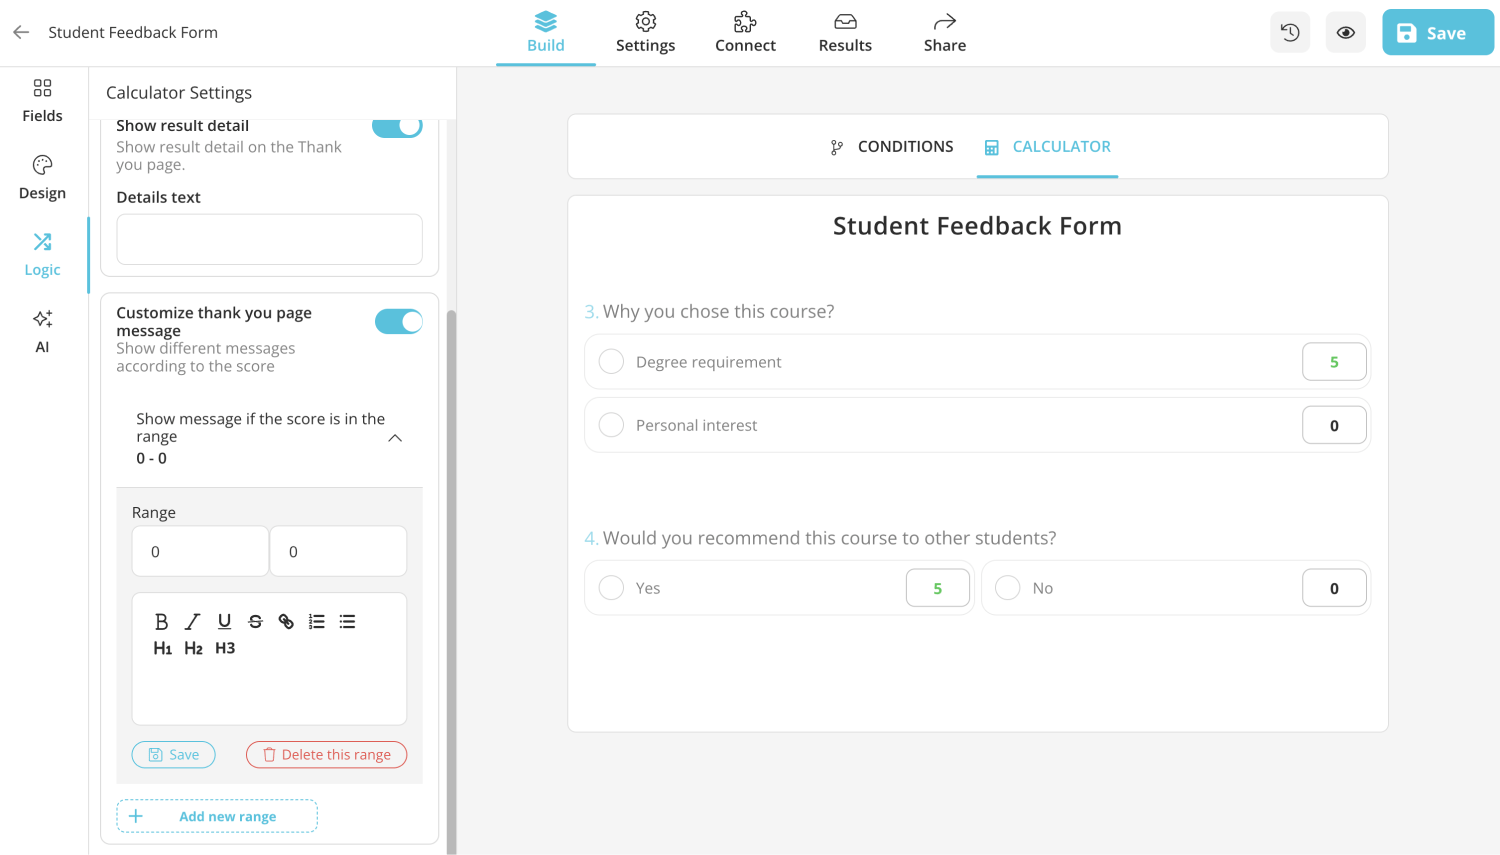
Add Thank-you page messages
What are the differences between forms.app and Google Forms?
Google Forms is considered one of the most beneficial online tools, but there are some aspects that Google Forms cannot manage, but forms.app can. It seems that Google Forms is considered the most useful and preferred form tool online, but there are some features that forms.app possesses and gives you simple usage. Here are some of them:
- Mobile application: It is possible to create forms using the browser on a mobile phone with Google Forms, but the platform does not offer a reliable mobile application. In contrast, forms.app provides mobile applications for download on Google Play and App Store. The platform is developed with a mobile-first approach, ensuring users can easily use forms.app on their mobile phone browsers as well.
- Product basket: The Product Basket field on forms.app is user-friendly and allows for accessible listing of products or services on sales order forms and offers the option to categorize items and include pictures, prices, and customizable options such as color or size.
- Geolocation restriction: If you want to limit the geographical area of respondents who can fill out your form, forms.app provides the geolocation restriction feature to allow for this. For example, if you are surveying public transportation in your city, you may wish to prevent individuals outside your city from filling out the form.
- Payment collection: forms.app allows users to collect payments, such as donations and fees, with the flexibility to allow the person filling out the form to set the amount, unlike Google Forms.
Conclusion
In light of what has been mentioned above, creating a self-grading quiz in Google Forms is a quick and easy way to assess and evaluate knowledge and skills. Using the built-in quiz features, you can assign points to questions, automatically calculate scores, and provide feedback to respondents. This feature is handy for educators, trainers, and administrators who need to grade large-scale assessments quickly and accurately.