When it comes to drawing attention and increasing your chances of successful data collection, a form's theme and visuals are like secret weapons. A fitting theme and color scheme for a form elevates the form’s ability to reach the participants and convince them that this is a form worth participating in.
In this article, you will learn a step-by-step guide on how to customize the theme in Google Forms, several expert tips while customizing the Google Forms layout, a better way to create forms and customize them with forms.app, and answers to frequently asked questions about Google Forms customization of themes.
How to customize the theme in Google Forms
The customizing feature in Google Forms offers several options for attracting participants' attention. Furthermore, customizing your form on Google Forms is simple, accessible, and has all the fundamental style options required when creating your form. The customization process is also a part of the creation process, so experiment with different options while you add your questions or create a header for your form.
1. Create your form
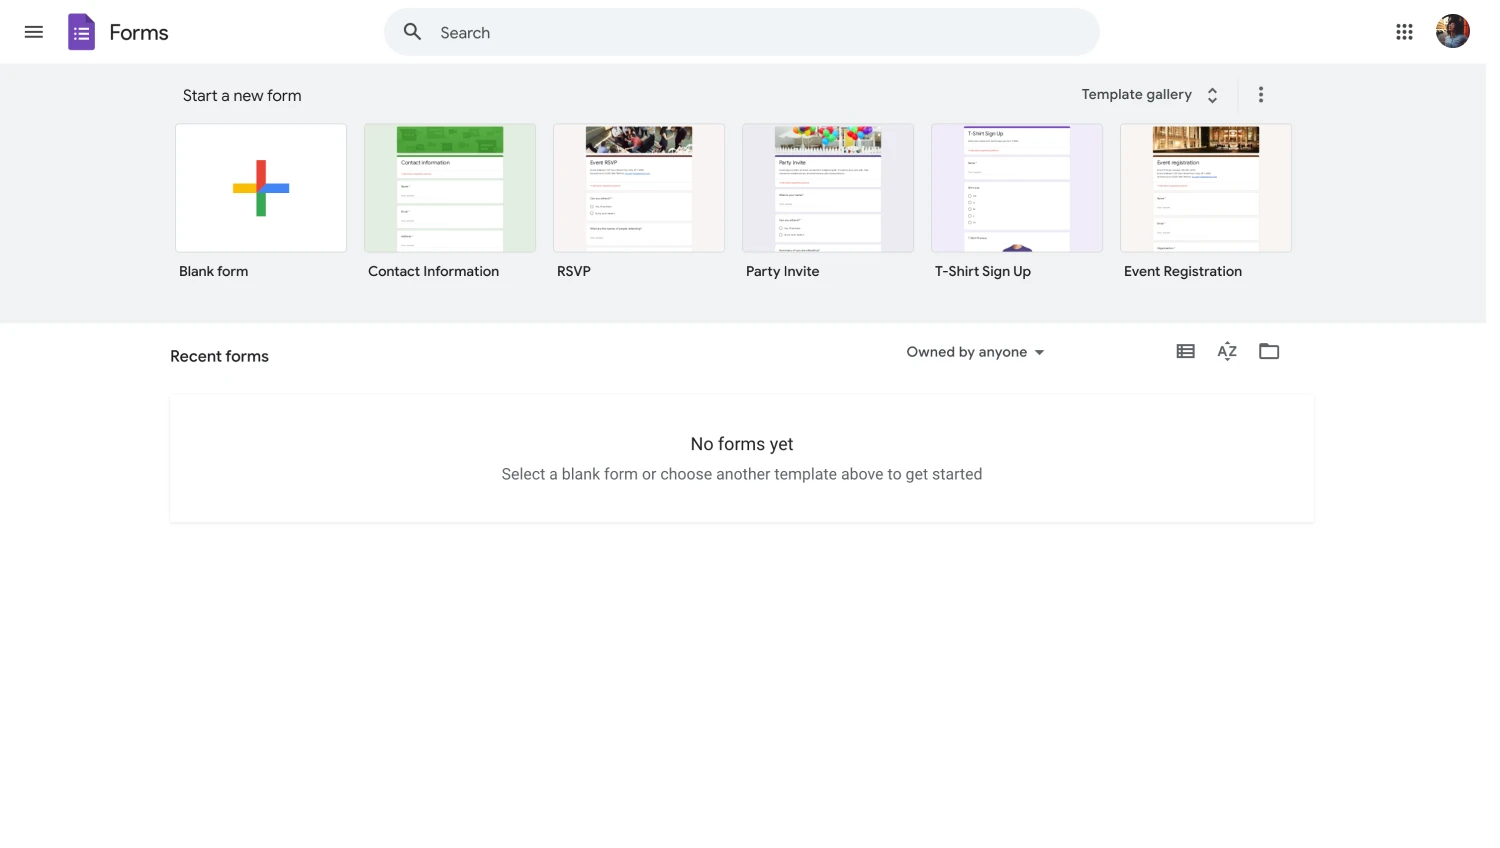
Start creating your form
The first step in customizing any form is creating one. To start the creation process, head to the Google Forms page and create your form. You can begin the creation process by working with a blank form or choosing one of the templates that Google Forms offers.
2. Add the questions
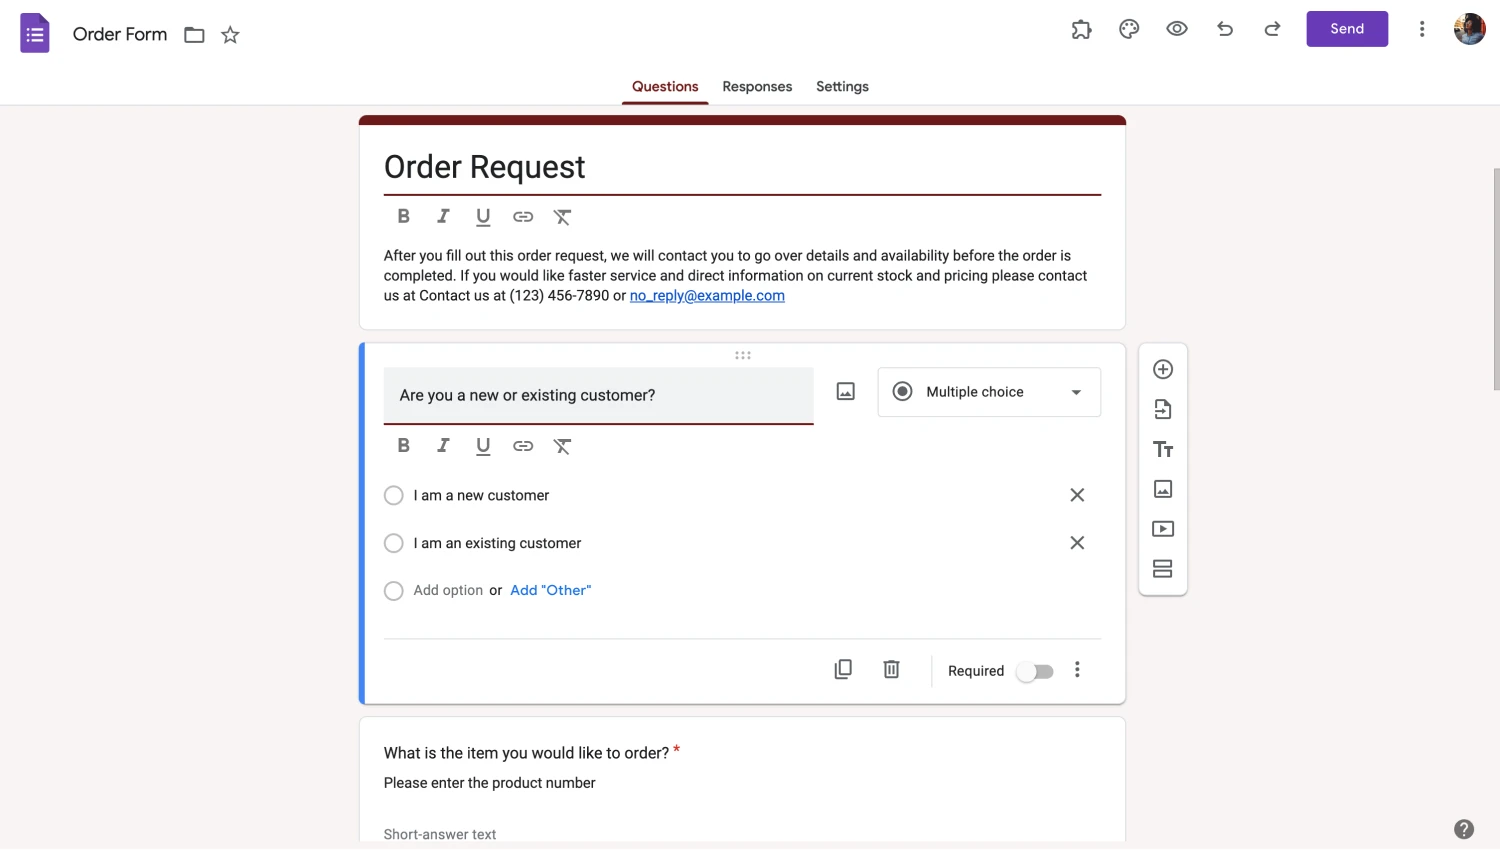
Start creating your form
You can add your questions and answer options once you choose which base you would like to start with. To add a new question, click the plus icon within a circle next to a question. To edit the question, click on the question you want to edit and make the necessary changes.
3. The palette icon
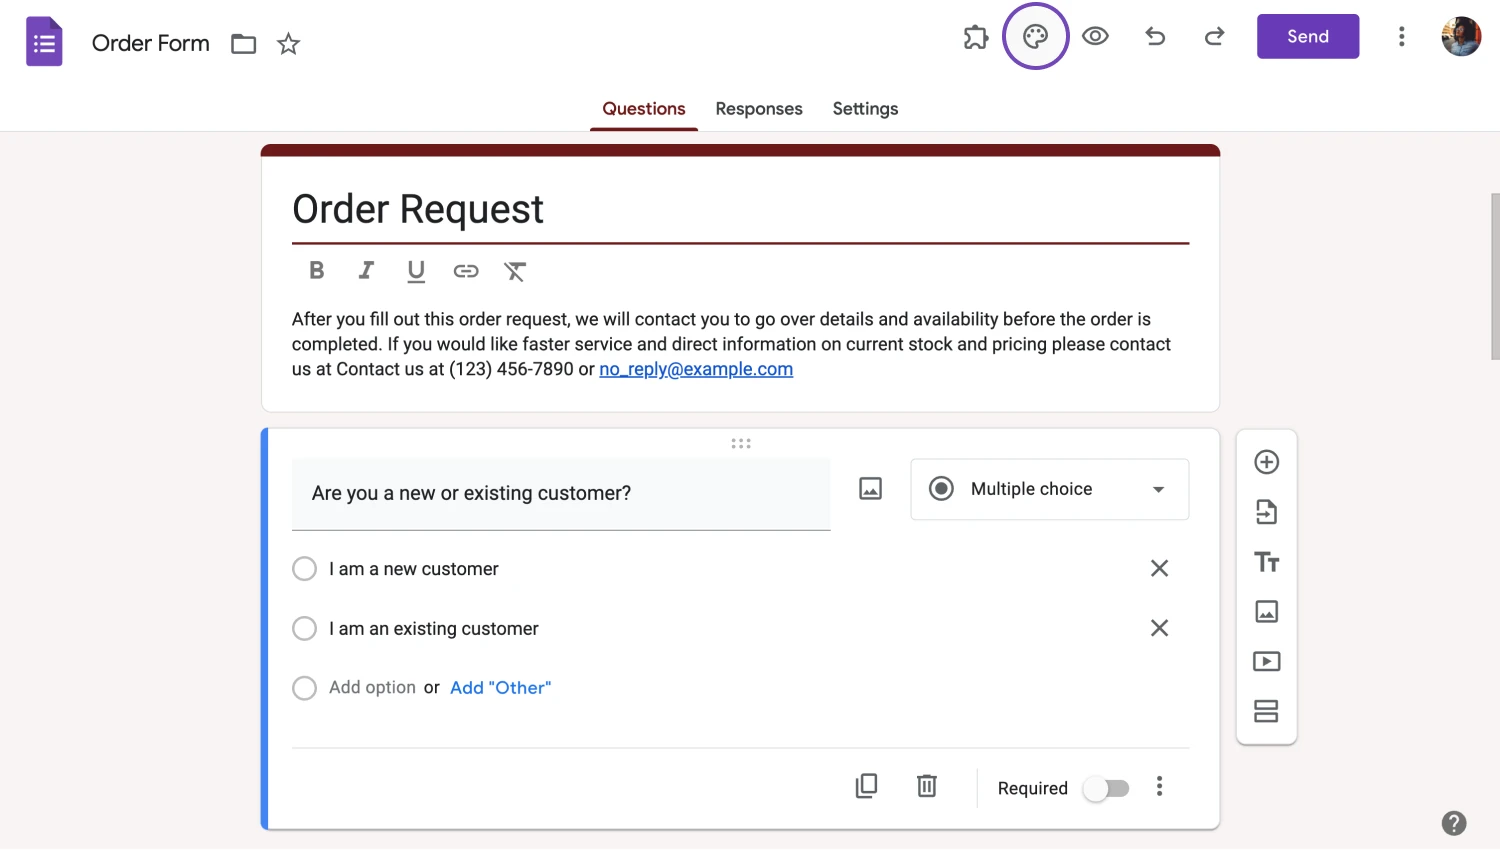
Start creating your form
After you finish the basics, it is time to start changing the form design. The main menu for controlling the overall theme of the form can be accessed by clicking on the palette icon at the top right corner of the page.
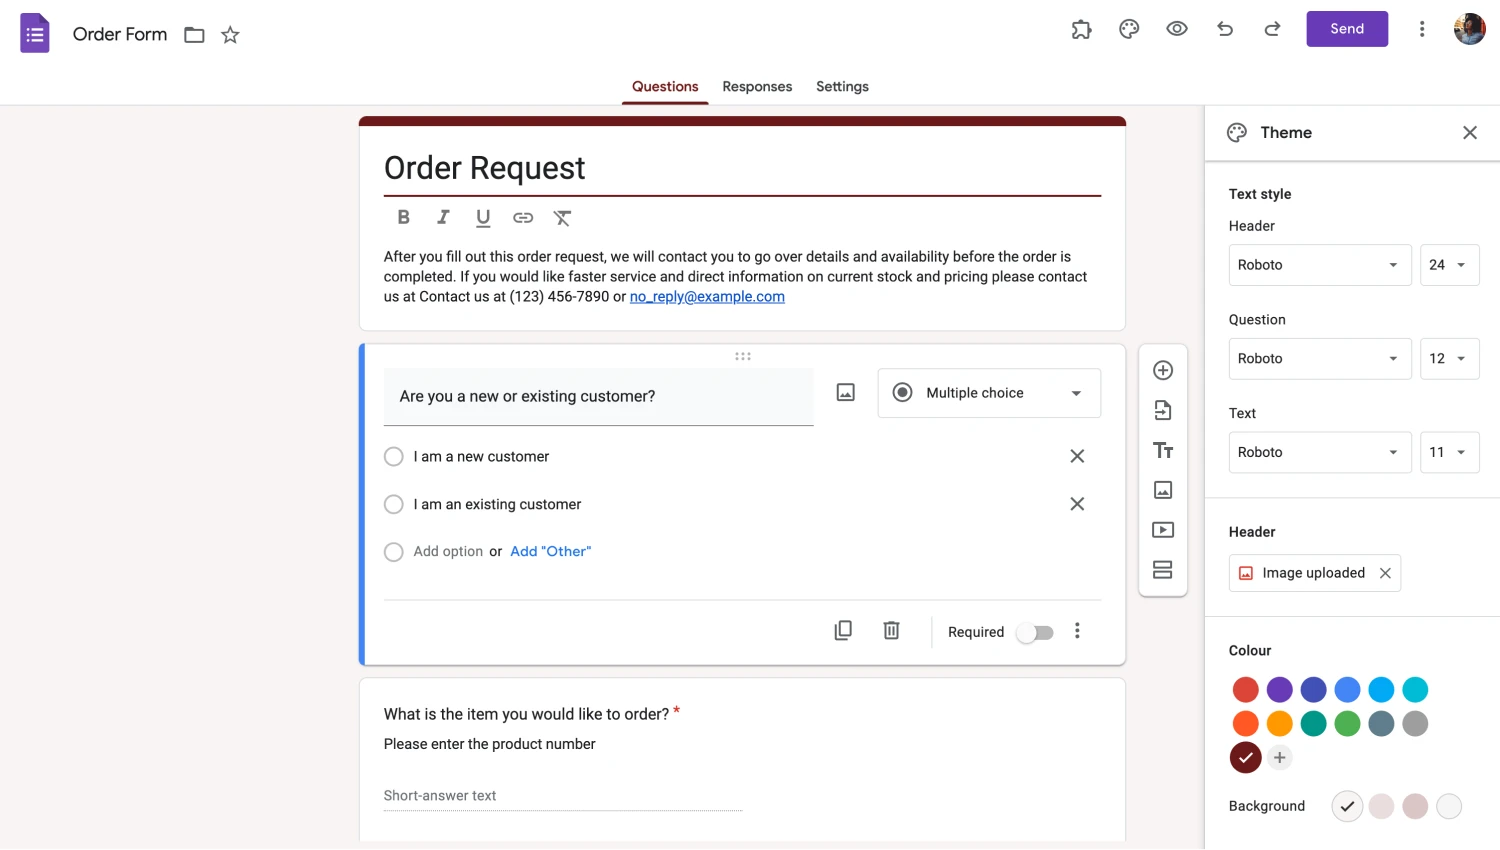
Customize the settings
From the “Theme” menu, you can change the background and main colors of the form, customize the font style and size, and add a header image to your form. Changing your form header image offers the most customization ability, as you can add images from your gallery, choose an image from Google Photos, or choose one of the images that Google Forms offers.
4. Different customization options
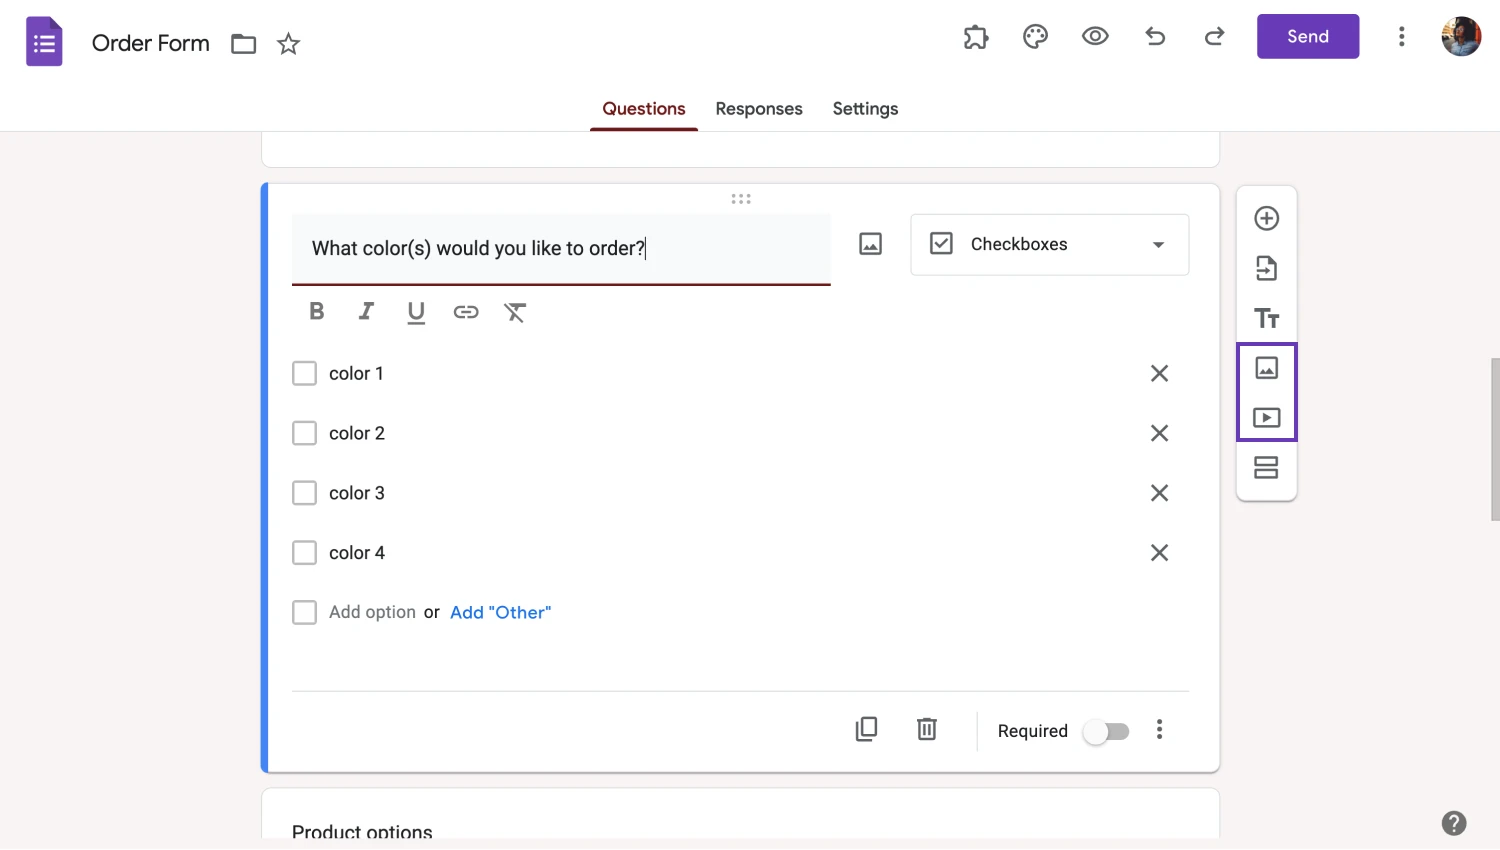
Add images or videos to your form
Several different customization options are available outside of the “Theme” menu. For example, you can add images or videos to questions by clicking on the question and then on the image or video icon.
Expert tips while customizing the theme
While learning the basics is important, if you want to get the most value out of your forms and form themes, you must learn the Google Forms tips and tricks. Keeping these 5 tips in mind while you are creating your form and customizing the theme will ensure that you create the most professional form possible.
🎨 Form theme should fit your goals: One of the most important tips to keep in mind is the connection between the theme of the questions and the visual theme. Do not go for bold and bright colors if you are going to present the form in a professional setting, and vice versa.
🎨 Do not distract your participants: Even if it is a form where you would like your participants to have a little fun, keep in mind that they are there to answer questions and give you valuable data, not to get distracted by the design.
🎨 Spend time on a good header image: Try to spend as much time as possible on a good header image. The image should be memorable, grab attention, and, if possible, include your business logo.
🎨 Have a draft on your mind: Do not experiment mindlessly with different options, and hope you find the right color combination. Before starting, imagine a draft and experiment from that base.
🎨 Pay attention to details: While often overlooked, details such as the right font option and font size matter. Try to select details that work together with the overall theme of the form and impress your participants.
How can you customize the theme in forms.app?
One of the best strengths of using forms.app is the endless customization options. You can always find a theme that fits your goals when it comes to creating your form with forms.app. Furthermore, the accessibility of the themes and other customization features makes it easy to understand and figure out. Of course, if you want to dig deeper into details, forms.app offers that as well.
1. Create your form
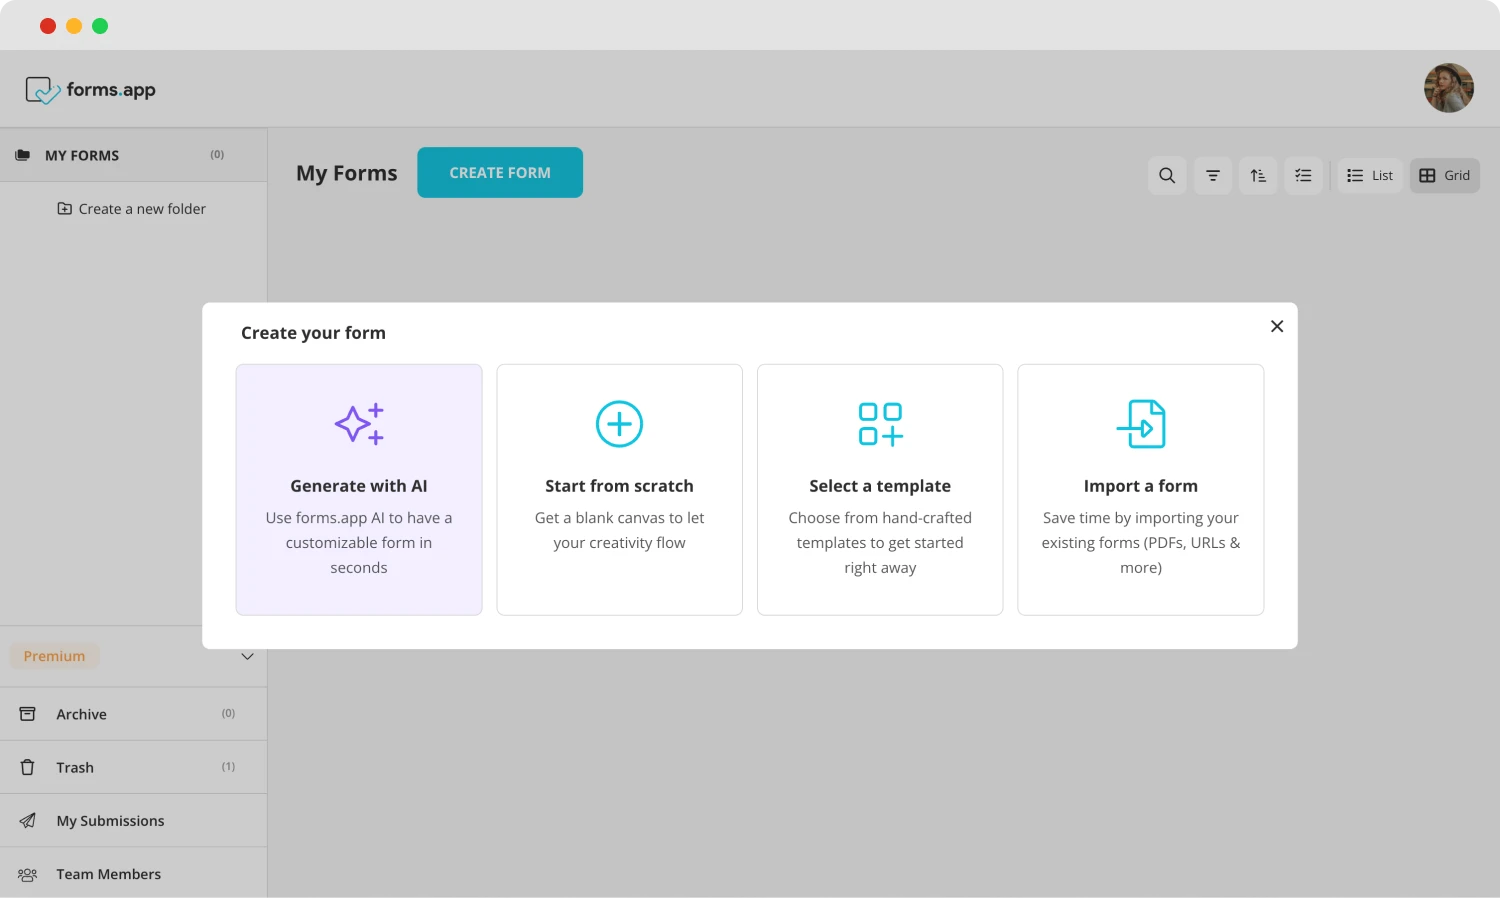
Choose a beginning option
As always, with every form creation platform, the first step in customizing your form is creating one. Thankfully, forms.app also offers advanced features when it comes to the creation process, offering you the option to start with a blank form, choose between endless template options, and use forms.app AI to create a personalized experience with just a sentence.
2. Add or edit your questions
After choosing between options to create your base, you can now start adding the all-important questions. To add your questions on forms.app, simply head to the “Fields” tab within the “Build” section and choose any field that fits your needs. Once you add the questions you want, you can customize them by clicking on them and making the necessary changes.
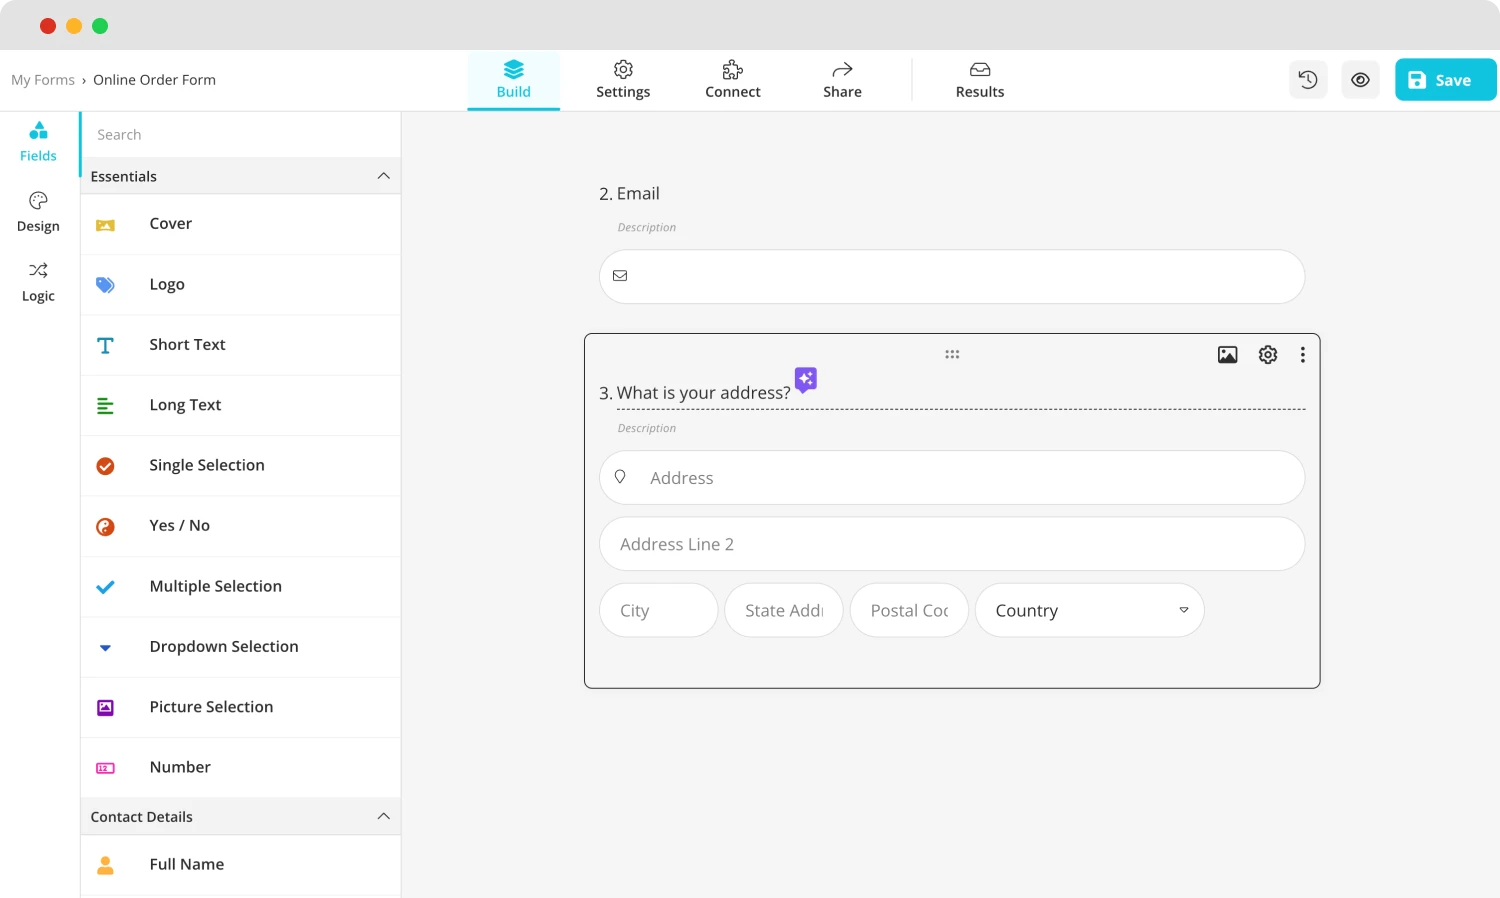
Add your questions
💡You can also use rewrite with forms.app AI to edit questions. Click the purple icon next to any question title to rephrase or rewrite your question using forms.app AI.
3. The “Design” tab
To access the vast selection of customization options within forms.app, simply head to the “Design” tab within the “Build” section. The “Design” tab offers many options, from themes to customizable colors, border radius options, font options, and button alignments.
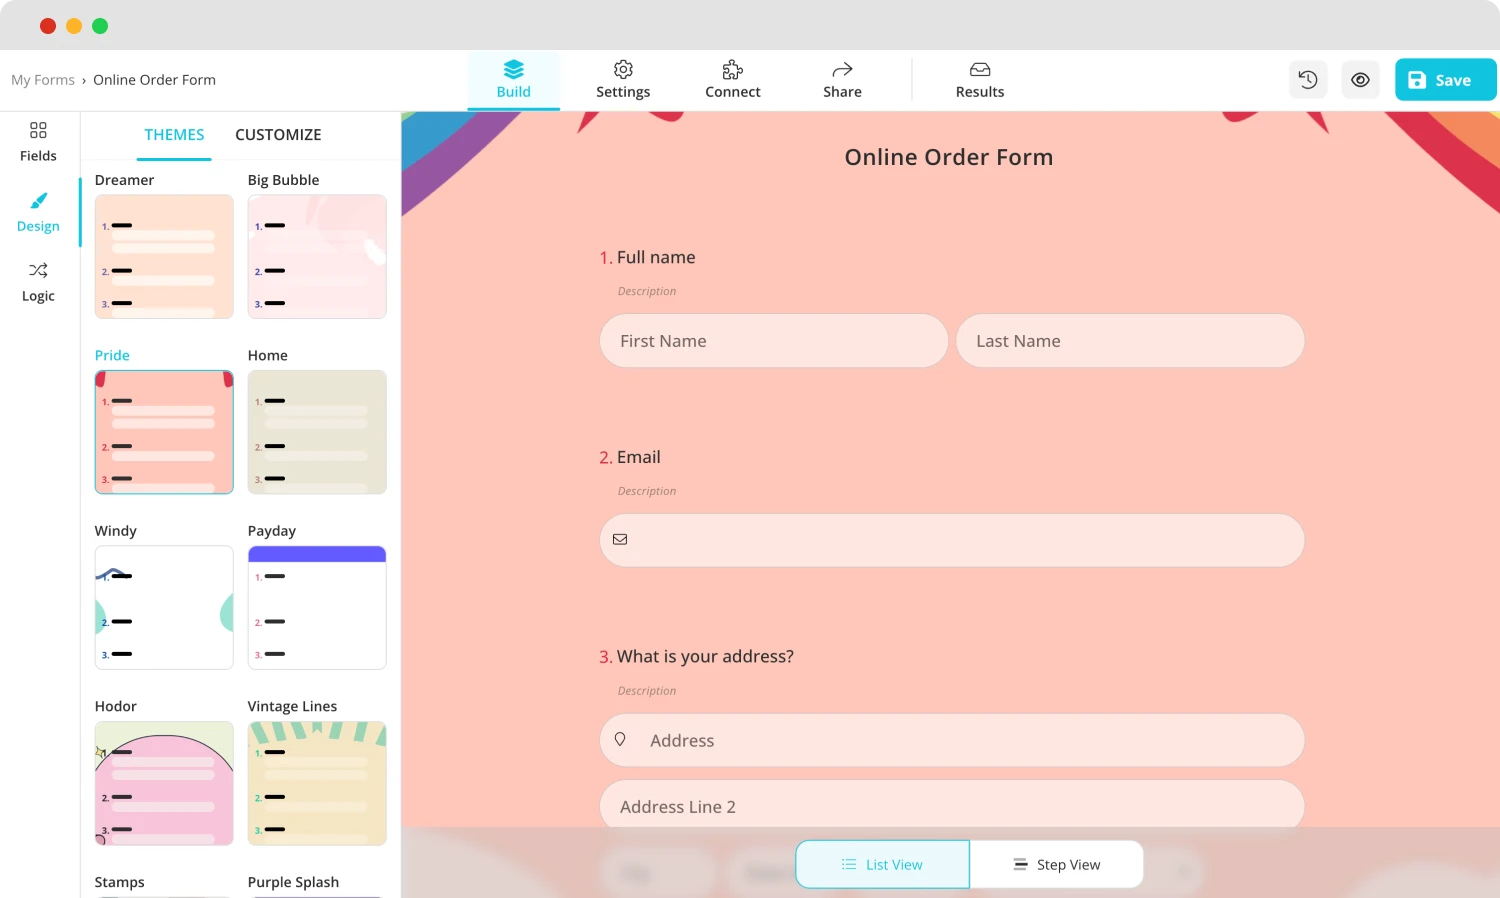
Head to Design
💡The design tab also allows you to have animated themes for your survey. Go to the end of the design tab to choose an animated theme.
4. Advanced customization options
One of the best areas that forms.app shines through is the option to go into details regarding customization features. You can access many of the details mentioned above by heading to the “Customize” section of the “Design” tab. Furthermore, you can access details such as creating your question or answer color or custom CSS options by scrolling to the end of the “Customize” section.
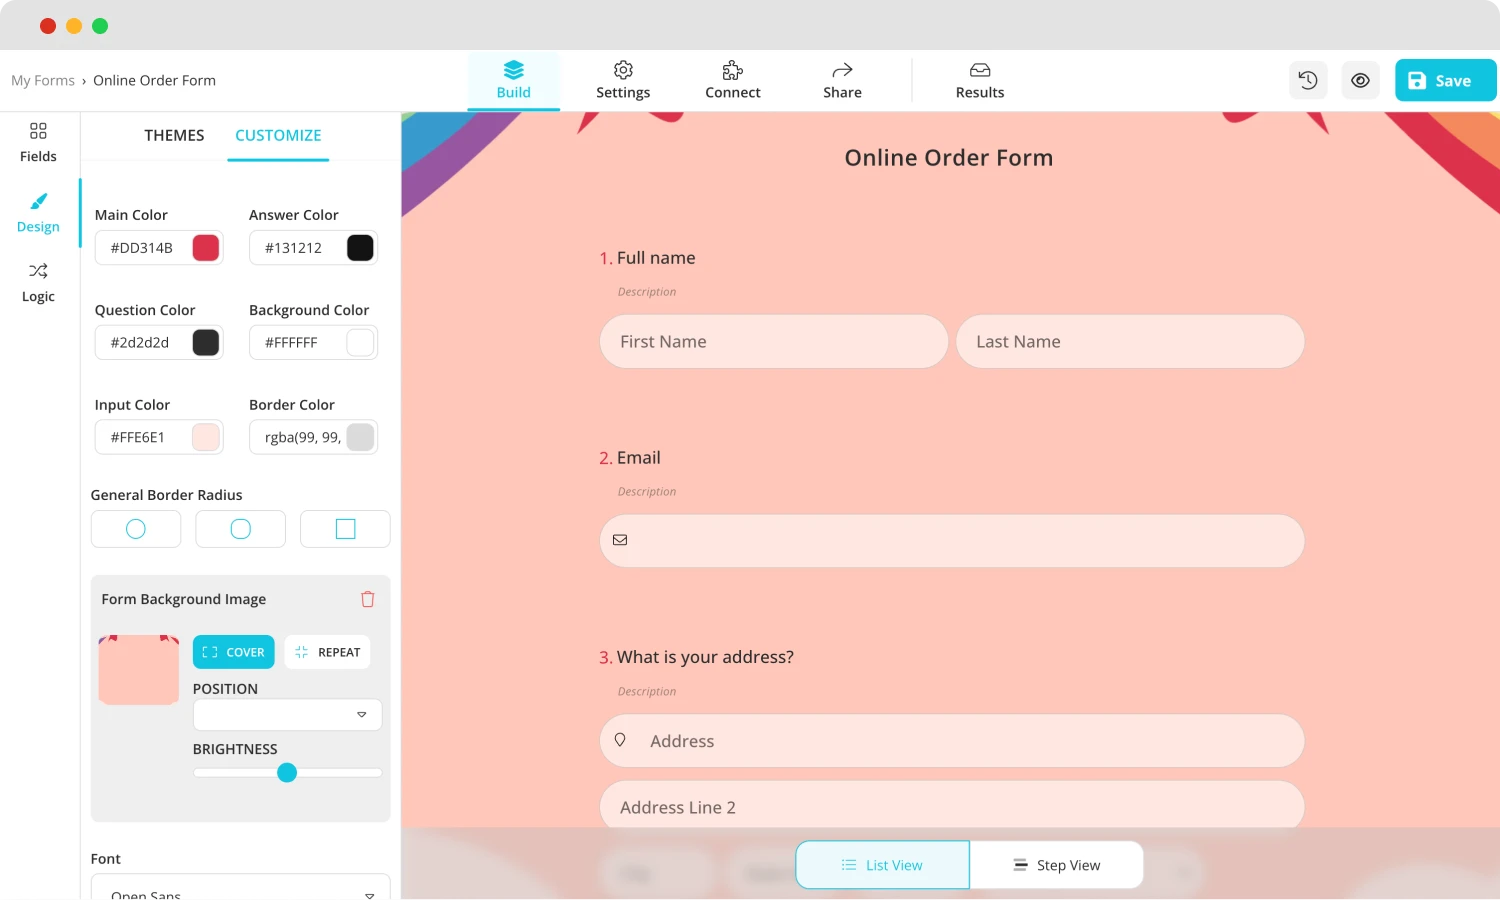
Customize the design settings
Frequently asked questions about the Google Forms themes
Now that you have learned the basics and the details about customizing your Google Forms themes, it is time to eliminate any questions in your mind by going over some of the frequently asked questions about the Google Forms themes.
While there is no option to get more themes from Google themselves, you can use third-party apps and add-ons to get more themes. To access third-party options, click on the puzzle icon at the top right side of the page and search for themes.
You can change several details of your form in Google Forms by clicking on the palette icon at the top right side of the page and heading to the “Themes” menu. This menu will allow you to change several visual details, such as the background color and fonts of the questions.
While a “fancy” Google Form can be a subjective opinion, you can change the colors to fit the fancy theme by heading to the “Themes” menu. Furthermore, you can search for examples of fancy Google Forms color coordinations from the internet and experiment with them by customizing these pre-made coordinations to your liking.
Final words
In summary, having a good theme for your Google Forms form can increase your rate of success and the quality of the data you collect by grabbing more attention from your participants. Furthermore, a form theme that works together with the overall theme of the questions can also increase the engagement rate.
In this article, we have looked at how to customize your form's theme in Google Forms, 5 expert tips to take your form creation process to the next level, and a better way to create and customize forms with forms.app. We have also examined some frequently asked questions about Google Forms themes.
It is up to you to make the best theme for your form and impress your participants!
Yakup is a content writer at forms.app. He is also a skilled translator. His hobbies include reading, learning about different languages, and different branches of sports. Yakup's expertise lies in translation, NoCode tools, and Google Forms.
